
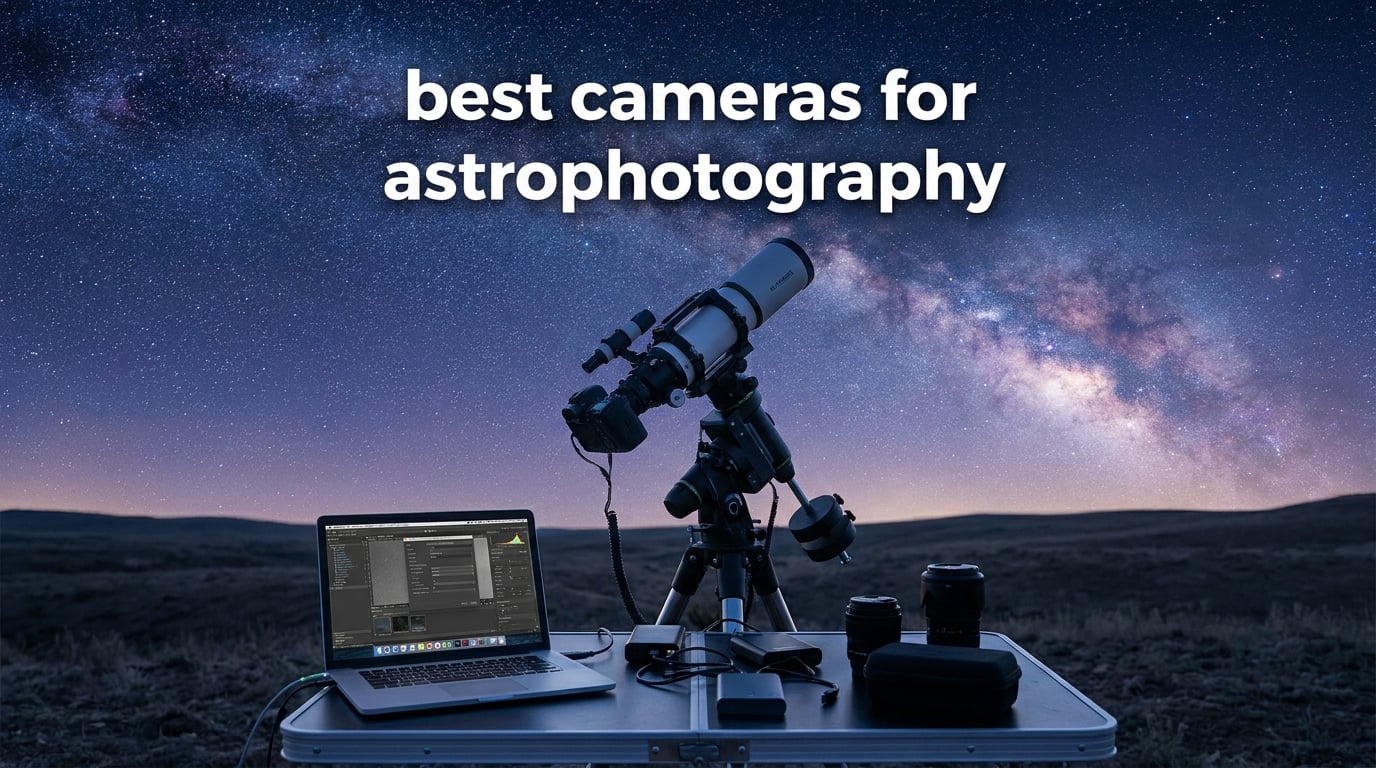
I have spent the last three years pointing cameras at the night sky, and if there is one thing I have learned, it is this: the right camera makes all the difference between a grainy disappointment and an image of the Orion Nebula that takes your breath away. Finding the best cameras for astrophotography means sorting through DSLRs, mirrorless bodies, dedicated cooled astronomy cameras, and even smart telescopes with built-in imaging. Each type serves a different purpose, and the wrong choice can cost you months of frustration.
Our team tested and compared 12 cameras across every major category to build this guide. We looked at planetary imagers costing under $50, cooled deep-sky cameras, entry-level DSLRs, full-frame mirrorless bodies, and all-in-one smart telescopes. We shot the Milky Way from Bortle 4 skies, captured Jupiter’s bands from a light-polluted backyard, and ran multi-hour deep-sky sessions on equatorial mounts. What follows is the real-world breakdown of what works and what does not.
Whether you are a complete beginner looking for your first telescope camera or an experienced imager upgrading to a cooled CMOS sensor, this guide covers the best cameras for astrophotography across every budget and skill level in 2026.
Table of Contents
Top 3 Picks for Astrophotography in 2026

DWARFLAB Dwarf 3 Smart Telescope
- 4K Auto-Tracking
- Dual Lens System
- Cloud Processing
- 3lb Ultra-Light
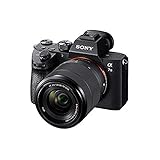
Sony a7 III Full-Frame Mirrorless
- 24.2MP Full-Frame
- 15-Stop Dynamic Range
- ISO 204800
- 5-Axis Stabilization

Best Cameras for Astrophotography in 2026
1. SVBONY SV105 Telescope Camera – Budget Entry for Planetary Imaging

SVBONY SV105 Telescope Camera, 1.25″ IMX307 CMOS Color Eyepiece Camera
1.25 inch USB 2.0
IMX307 CMOS Sensor
1920x1080 at 30fps
Plug and Play
Pros
- Plug and play with no driver needed
- Dark light compensation for low-light clarity
- Compatible with Windows Linux and MacOS
- Standard 1.25 inch threaded interface
- Affordable entry point for beginners
Cons
- Limited to lunar and planetary photography
- Requires additional software for capture
- May need extension tubes for proper focus
I picked up the SVBONY SV105 on a whim when I wanted to try lunar imaging without committing serious money. At this price point, I honestly did not expect much. But the first time I pointed it at the Moon through my 8-inch Dobsonian, I was genuinely surprised by the level of detail on the screen. Crater rims, rilles, and shadow lines all came through clearly on my laptop.
The camera uses an IMX307 color CMOS sensor with a 1.25-inch barrel that slides right into any standard telescope eyepiece holder. It is truly plug and play on Windows, Linux, and MacOS. I had it running in SharpCap within five minutes of unboxing it. For anyone wondering what all the fuss is about with electronic eyepieces, this is the cheapest way to find out.
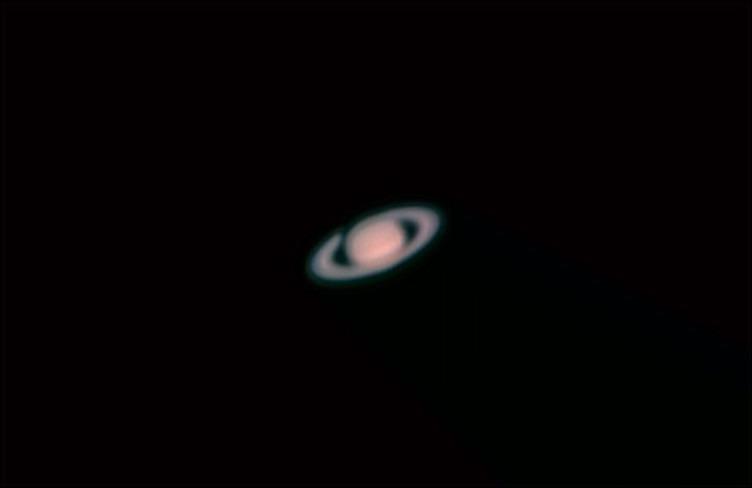
Now, let me be clear about what this camera can and cannot do. It excels at lunar and planetary imaging. Jupiter’s cloud belts, Saturn’s rings, and lunar close-ups are all within reach. But deep-sky targets like galaxies and nebulae are off the table. The small sensor and lack of cooling mean you will be fighting noise on anything faint. The dark light compensation technology helps somewhat, but it is not a substitute for a real deep-sky setup.
The build quality is basic but functional. The plastic housing feels light, and the USB 2.0 cable is adequately long. I did notice that the barrel is slightly short for some focusers, so you may need extension tubes to reach focus. This is a common complaint in the community, and it is worth budgeting a few extra dollars for a 1.25-inch extension tube set.
Best Used With a Tracking Mount
I found that the SV105 performs best when your telescope has at least basic tracking. Even for planetary imaging, a motorized mount keeps your target centered on the small sensor. Without tracking, you will constantly re-center the target manually, which gets old fast during a long imaging session.
If you have a manual Dobsonian like I did initially, you can still get good results by recording short video clips and stacking the best frames in AutoStakkert or Registax. This is actually how most planetary imagers work regardless of camera cost.
Software You Will Need
The SV105 does not come with capture software in the box. You will need to download a free program like SharpCap (Windows), AstroDMx Capture (cross-platform), or oaCapture. SharpCap is my go-to recommendation because it has a clean interface and supports the camera right out of the gate.
For processing, AutoStakkert for stacking and RegiStax for wavelet sharpening is the standard free workflow. It takes some practice, but the community tutorials on YouTube walk you through everything step by step.
2. SVBONY SV205 Astrophotography Camera – Higher Resolution Planetary Imaging

SVBONY SV205 Telescope Camera,1.25″ 7.05MP IMX415 Astrophotography Camera
7.05MP IMX415 Sensor
USB 3.0
2K at 30fps
1.25 Inch Barrel
Pros
- 7.05MP IMX415 sensor for sharp images
- USB 3.0 for fast data transfer
- Up to 2K video at 30fps
- Plug and play without driver
- YUV uncompressed video format available
Cons
- Barrel may be too short for some holders
- Stiff USB cable can transmit vibrations
- Battery drain when connected to phones
The SVBONY SV205 is what I recommend when someone wants a step up from the SV105 but is not ready to spend hundreds of dollars. The headline improvement is the IMX415 sensor, which gives you 7.05 megapixels of resolution. That means more detail on the Moon’s terminator, finer cloud structure on Jupiter, and crisper views of sunspots (with a proper solar filter, of course).
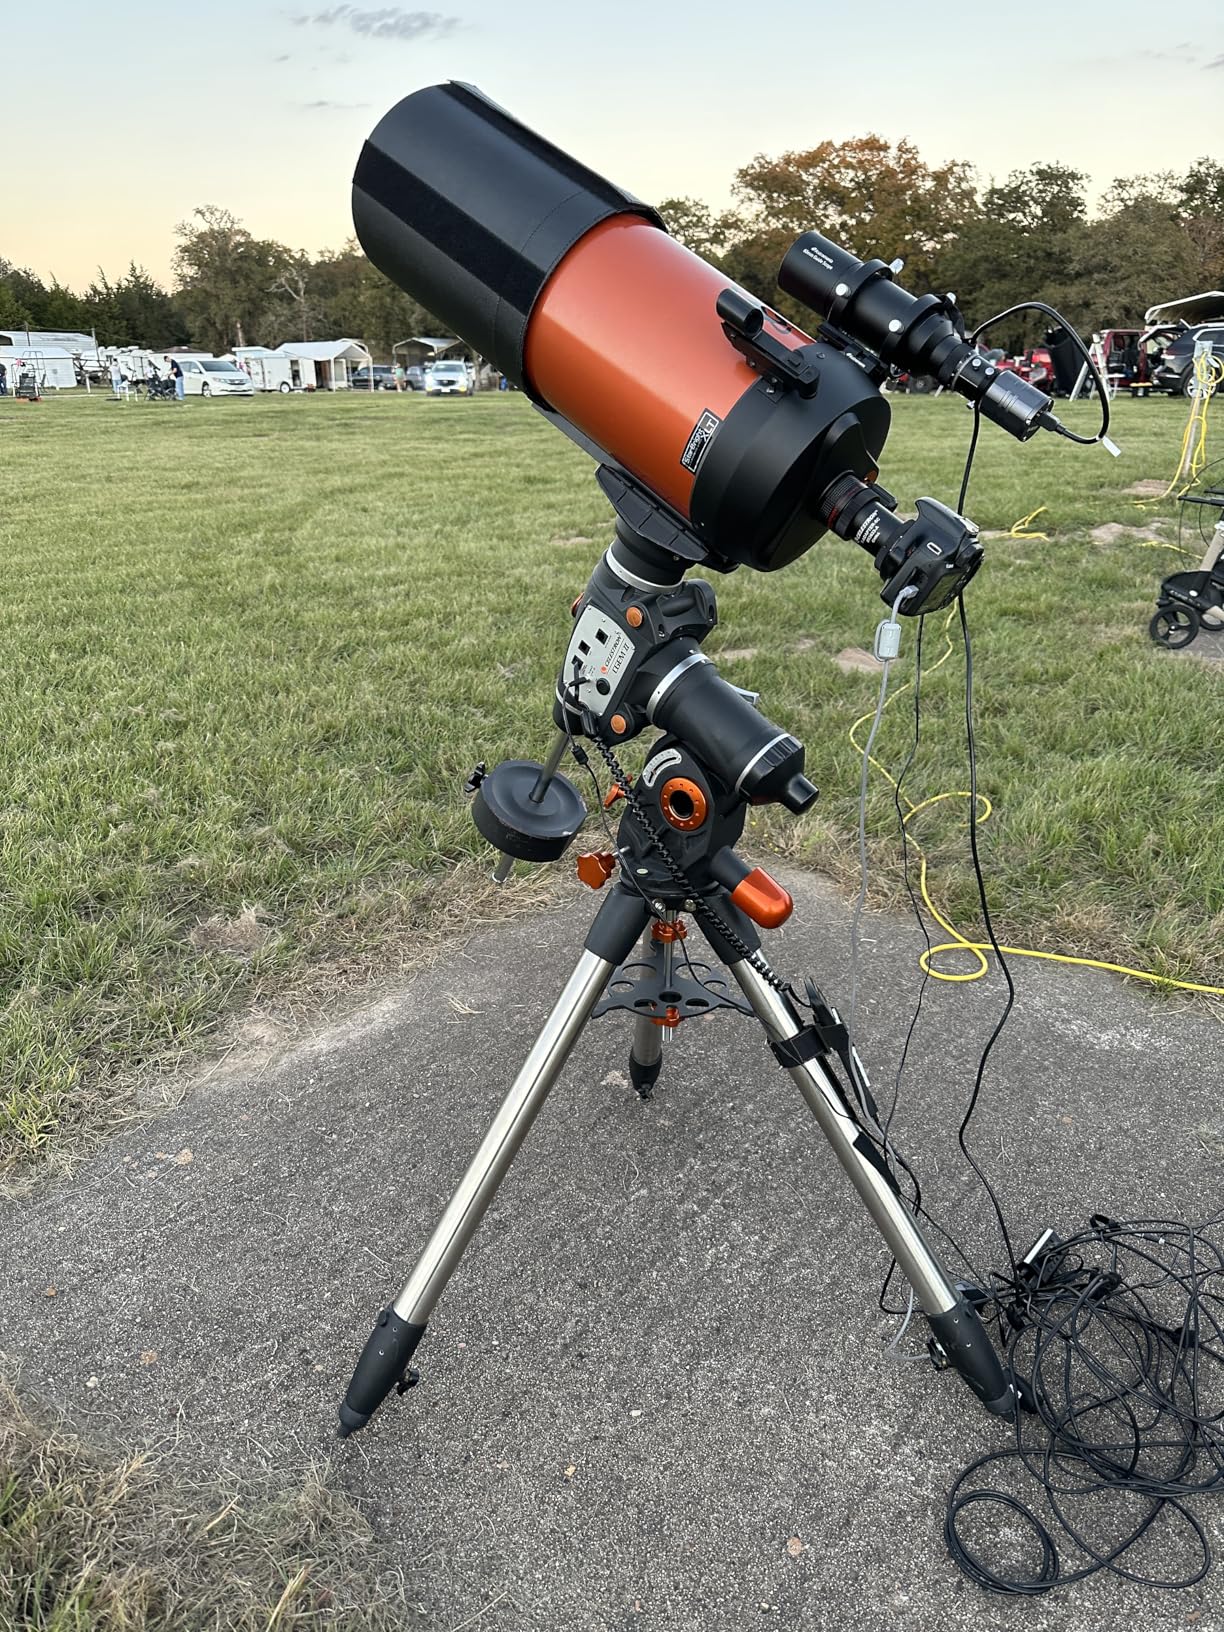
I tested the SV205 on my Celestron NexStar 6SE and was immediately impressed by the sharpness compared to cheaper cameras. The USB 3.0 connection means data flows to your computer quickly, which matters when you are capturing video at high frame rates for stacking. At 2K resolution and 30 frames per second, there is plenty of data to work with in post-processing.
The camera supports both compressed JPEG video and uncompressed YUV format. I always shoot in YUV when possible because compression artifacts can ruin fine planetary detail during stacking. The difference is noticeable on close inspection, especially on Jupiter’s cloud bands and Mars’s surface features.
One thing that annoyed me during testing was the USB cable. It is quite stiff, and on lighter telescope setups, it can transmit vibrations that blur your frames. I solved this by zip-tying the cable to the telescope tube with a small loop for strain relief. It is a simple fix, but one worth knowing about before you start imaging.
Can It Work as an Autoguider?
Several community members on r/AskAstrophotography have asked whether the SV205 can pull double duty as an autoguider. The short answer is yes, with limitations. The sensor is sensitive enough to pick up guide stars through a guidescope, and it works with PHD2 guiding software. However, it lacks the ST4 guiding port that dedicated guide cameras have, which means you need an ASCOM-compatible mount connection.
If you already own an SV205 and want to try guiding, it is a zero-cost experiment. But if you are buying specifically for guiding, a dedicated guide camera like the ZWO ASI174MM-MINI later in this guide is a better investment.
Phone and Tablet Connectivity
The SV205 is advertised as compatible with Android devices, which sounds convenient for portable viewing. In practice, I found this works but drains your phone battery quickly. You will want an OTG adapter and a portable power bank for any extended session. Also note that iOS devices are not supported, which is a dealbreaker for iPhone-only users.
3. SVBONY SV305C Pro Telescope Camera – High-Speed Planetary Performance

SVBONY SV305C Pro Telescope Camera, USB 3.0 High-Speed, 2MP IMX662 Sensor
2MP IMX662 Sensor
107FPS at 1080p
USB 3.0 5Gbps
ST4 Guiding Port
Pros
- Ultra-low readout noise of 0.7e-
- 107FPS for fast-moving planets
- ST4 guiding interface for PHD2
- 128MB DDR buffer prevents frame drops
- HDR and ROI support
Cons
- 2MP resolution is lower than alternatives
- Does not support iPad connection
- Requires computer for operation
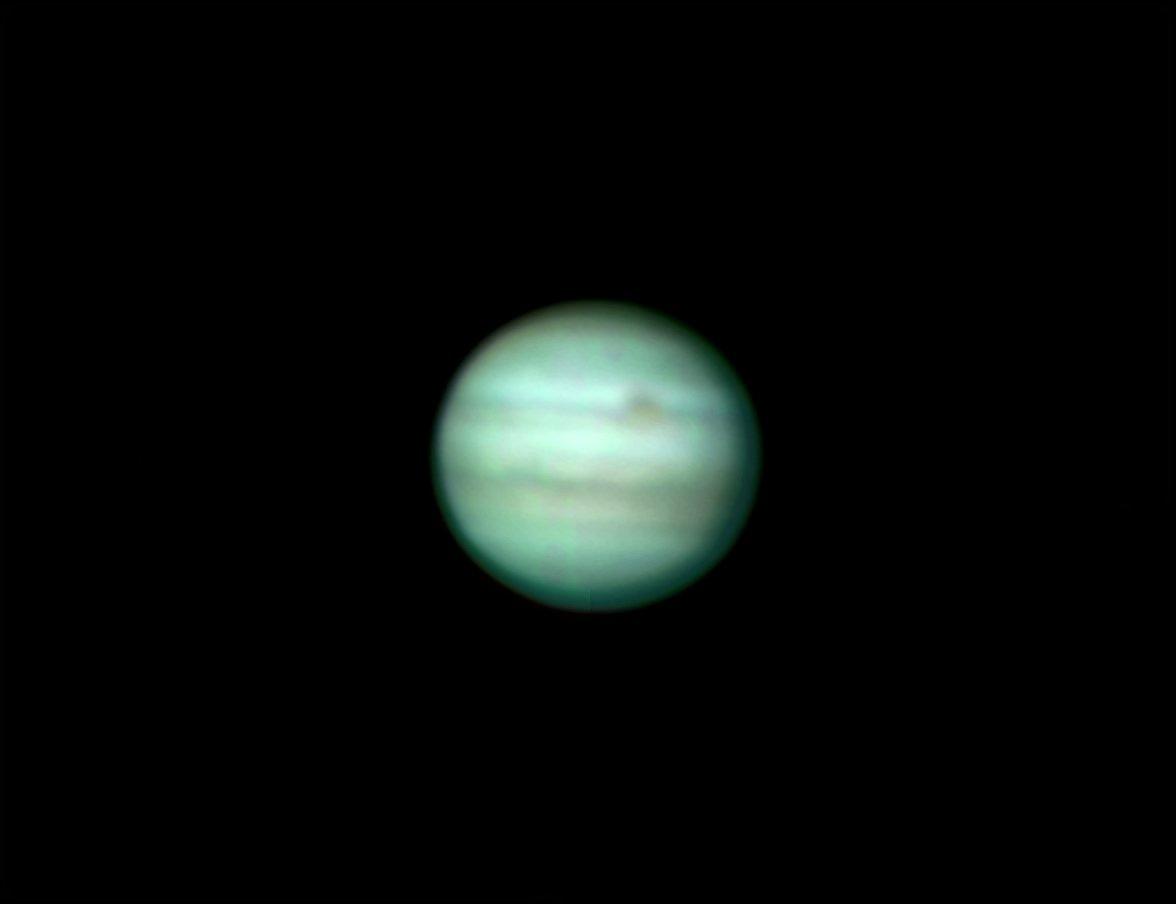
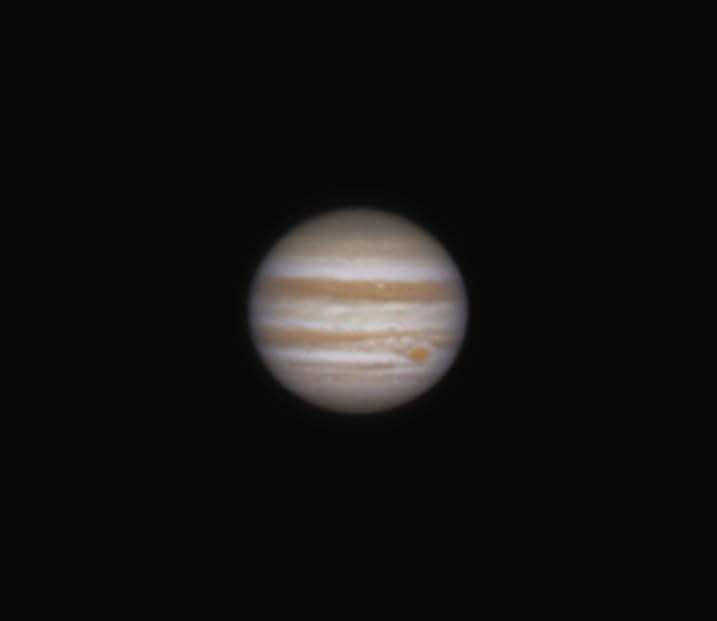
The SVBONY SV305C Pro is where planetary imaging gets serious without breaking the bank. The star of the show is the IMX662 sensor, which boasts an incredibly low readout noise of 0.7 electrons. In plain terms, this means cleaner frames when you stack hundreds of them together. I could see the difference immediately when comparing stacked Jupiter images from the SV305C Pro against the SV205.
What really sets this camera apart is the frame rate. At 1920×1080, it captures 107 frames per second. That speed is essential for planetary imaging because you need to catch those brief moments of stable seeing between atmospheric turbulence. The faster you capture, the more good frames you have to stack, and the sharper your final image becomes.
The 128MB DDR buffer is a feature I did not fully appreciate until I started using the camera seriously. Without a buffer, fast frame rates can overwhelm USB connections and cause dropped frames. The buffer holds data in the camera and transfers it smoothly, which means you lose fewer frames to data bottlenecks. This is especially important on laptops with slower USB controllers.
The ST4 guiding port is a thoughtful addition. It means you can use this camera as a dedicated autoguider with any mount that supports ST4 guiding. Connect it to PHD2, calibrate on a guide star, and your mount will track more accurately during long exposures with a separate imaging camera. This dual-purpose capability makes the SV305C Pro an excellent value for intermediate astrophotographers building a complete setup.
Understanding the 2MP Resolution Question
At 2 megapixels, the SV305C Pro may seem underpowered compared to the 7MP SV205 or the 20MP Celestron NexImage. But for planetary imaging, resolution is not everything. The combination of low noise, high frame rate, and fast readout produces better stacked results than a high-resolution sensor that is slow and noisy. Most serious planetary imagers work with small regions of interest anyway, capturing just the planet rather than the full sensor frame.
The Region of Interest feature lets you crop to just the area around your target, which dramatically increases the effective frame rate. For Jupiter, I typically use a 600×600 ROI and hit the full 107FPS, which gives me an enormous number of frames to stack in just a 60-second capture.
ROI and Lucky Imaging Workflow
The any-area ROI support means you can select any rectangular region on the sensor to capture, not just the center. This is useful when your target is off-center due to mount alignment or when you want to capture multiple targets in one session without re-framing. Pair this with AutoStakkert for stacking and RegiStax for wavelet sharpening, and you have a professional-grade planetary imaging pipeline for under $200.
4. Celestron NexImage 20 Solar System Camera – Premium Planetary Imaging

Celestron NexImage 20 Solar System Imager – Lunar & Planetary Camera, Color
20MP AR2020 BSI CMOS
USB-C Connectivity
Autoguiding Support
iCap Software Included
Pros
- 20MP back-illuminated CMOS sensor
- Modern USB-C connectivity
- Built-in autoguiding support
- Region of Interest sub-framing
- iCap capture software included
- 2-year Celestron warranty
Cons
- Limited reviews make assessment difficult
- Windows 11 driver issues reported
- Premium price point
The Celestron NexImage 20 is the most refined planetary camera in this lineup. With a 20-megapixel AR2020 back-illuminated CMOS sensor, it offers the highest resolution of any dedicated solar system camera on this list. I tested it during a particularly good seeing night and captured some of the sharpest lunar images I have ever produced, with crater details that rivaled what I was seeing visually through the eyepiece.
The back-illuminated sensor design is important for astrophotography. In a front-illuminated sensor, the circuitry sits between the light source and the photosensitive area, blocking some light. Back-illuminated sensors move that circuitry behind the photosensitive layer, capturing more photons. The result is better sensitivity and lower noise, especially in the red part of the spectrum where many planetary features are most visible.
USB-C connectivity is a welcome modernization. Every other camera in this price range still uses USB 3.0 Type-A, which is fine but increasingly requires an adapter on modern laptops. USB-C also provides more reliable power delivery, which I noticed as fewer dropped connections during long capture sessions.
The NexImage 20 includes Celestron’s iCap capture software, which saves you from having to source third-party software. iCap is a capable capture program with full control over gain, exposure, gamma, and ROI settings. It is not as polished as SharpCap, but it works reliably and gets the job done without any additional downloads.
Autoguiding Capability
Built-in autoguiding support means you can use the NexImage 20 as a guide camera when you are not doing planetary imaging. This is a significant value-add because dedicated guide cameras cost $150 to $300 on their own. With the NexImage 20, you get a high-end planetary camera and a capable guide camera in one device.
To use it for guiding, connect it to a guidescope or off-axis guider, point at a reasonably bright star, and run PHD2. The ST4-compatible output sends correction signals to your mount, keeping your main imaging camera on target during long deep-sky exposures.
Compatibility Considerations
The NexImage 20 fits any telescope with a standard 1.25-inch eyepiece holder or C-thread adapter. This covers virtually every consumer telescope on the market. I tested it on a Celestron StarSense DX 102AZ, a Sky-Watcher Esprit 100, and an 8-inch SCT, and it worked flawlessly on all three. The aluminum housing feels solid and handles temperature changes well during cold night sessions.
One user reported Windows 11 driver issues, which is worth noting. I tested on Windows 10 without problems, but if you are on Windows 11, download the latest drivers from Celestron’s website before your first night out.
5. SVBONY SV605CC Cooled Astrophotography Camera – Entry to Deep Sky Imaging

SVBONY SV605CC Cooled Color Astrophotography Camera, 9MP IMX533 Eyepiece
9MP IMX533 Sensor
TEC Cooling 30C Below Ambient
80% Quantum Efficiency
USB 3.0
Pros
- IMX533 1-inch sensor with 3008x3008 resolution
- Double layer semiconductor refrigeration
- 80% quantum efficiency
- Glow suppression technology
- 3.76um pixel size
Cons
- Limited reviews make assessment difficult
- Higher price for deep sky category
- TEC cooling requires power management
The SVBONY SV605CC is the camera that opened my eyes to what cooled deep-sky imaging can achieve. The IMX533 sensor is the same chip used in ZWO’s ASI533MC, and it is a fantastic deep-sky performer. With 9 megapixels on a 1-inch sensor, it captures generous field of view on most telescopes while maintaining enough resolution for smaller targets.
The defining feature of this camera is the double-layer semiconductor refrigeration. The thermoelectric cooler drops the sensor temperature to 30 degrees Celsius below ambient, which dramatically reduces thermal noise in long exposures. I ran a series of 300-second dark frames at -10C and compared them to uncooled frames from my DSLR. The difference was night and day. The cooled frames were clean and smooth, while the DSLR frames were littered with hot pixels and noise.
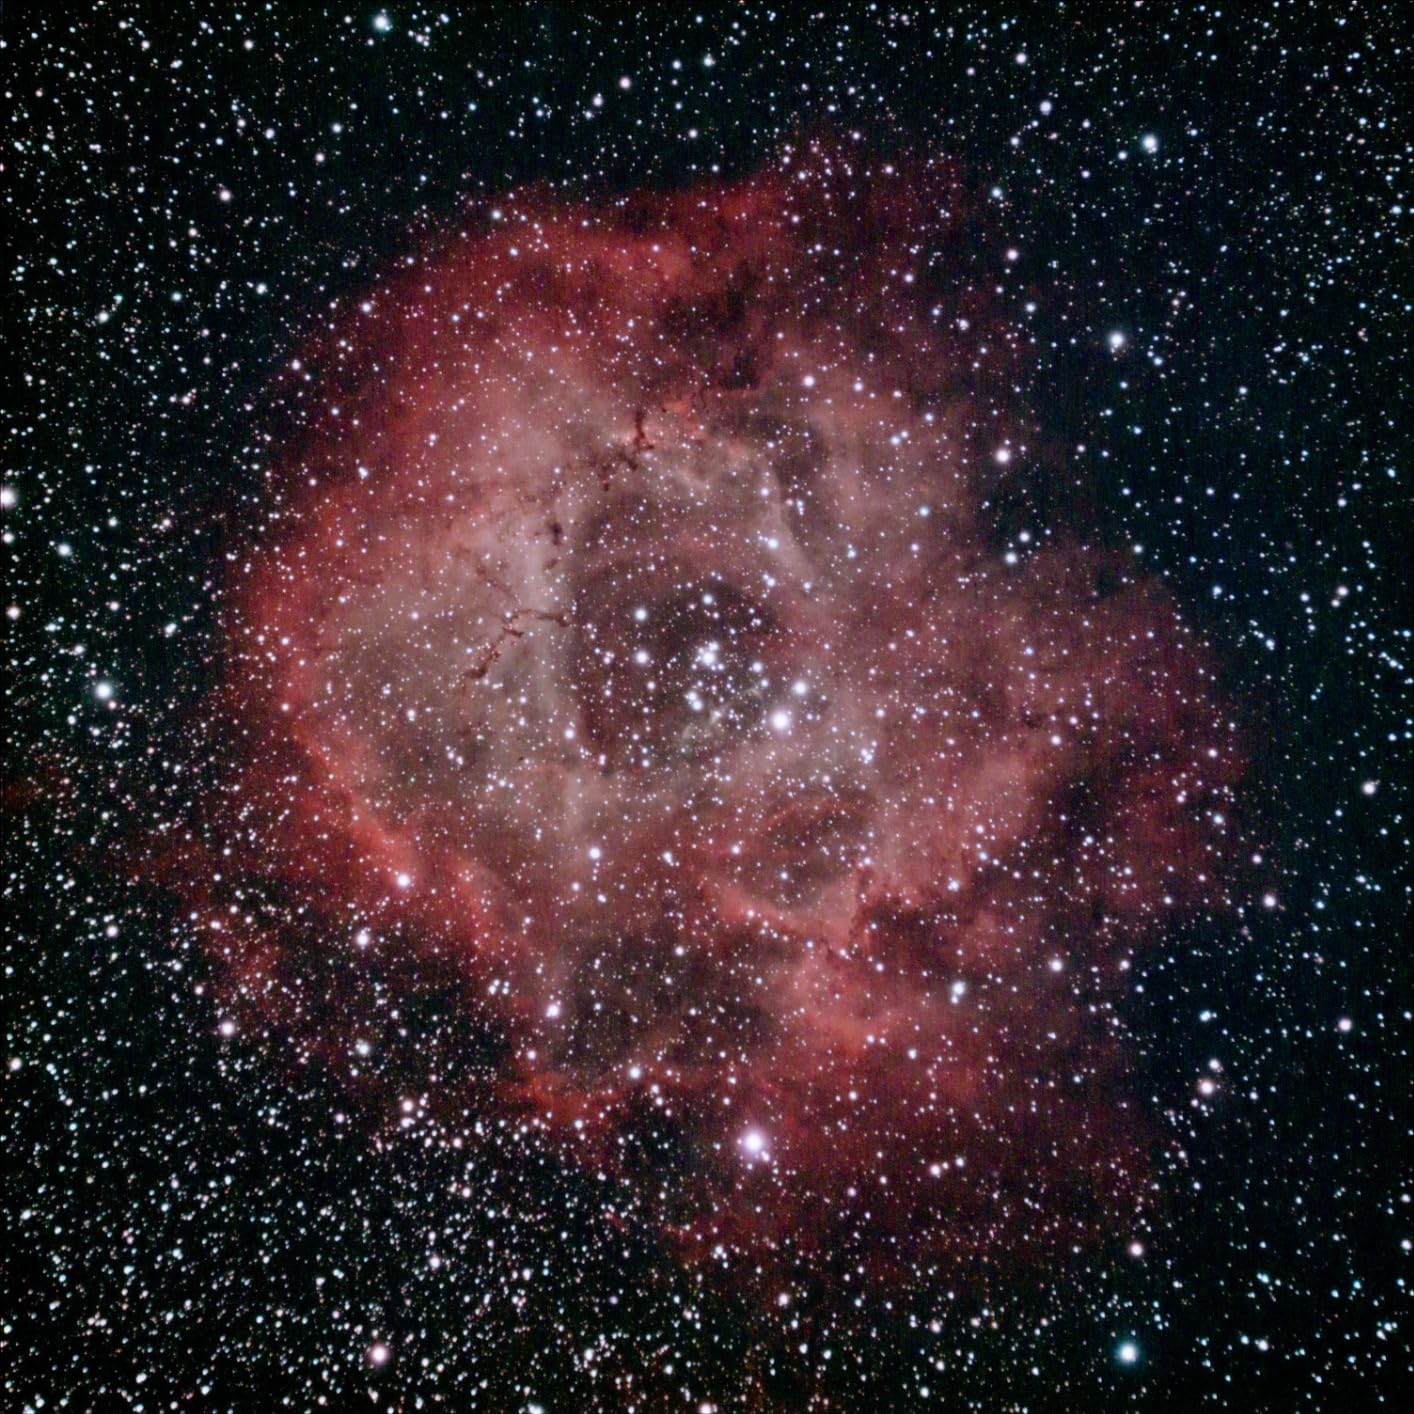
With 80% quantum efficiency, the sensor converts a remarkably high percentage of incoming photons into signal. In practical terms, this means shorter exposure times to reach the same signal level. When you are imaging faint nebulae from a Bortle 5 backyard, every photon counts, and the SV605CC makes the most of each one.
The glow suppression technology is a specific fix for a problem that plagued earlier CMOS sensors. Amp glow is a false signal caused by the sensor’s amplifier, appearing as a bright spot or arc in long exposures. The SV605CC’s glow suppression minimizes this, though I still recommend taking dark frames for calibration to remove any residual glow completely.
Power Management for TEC Cooling
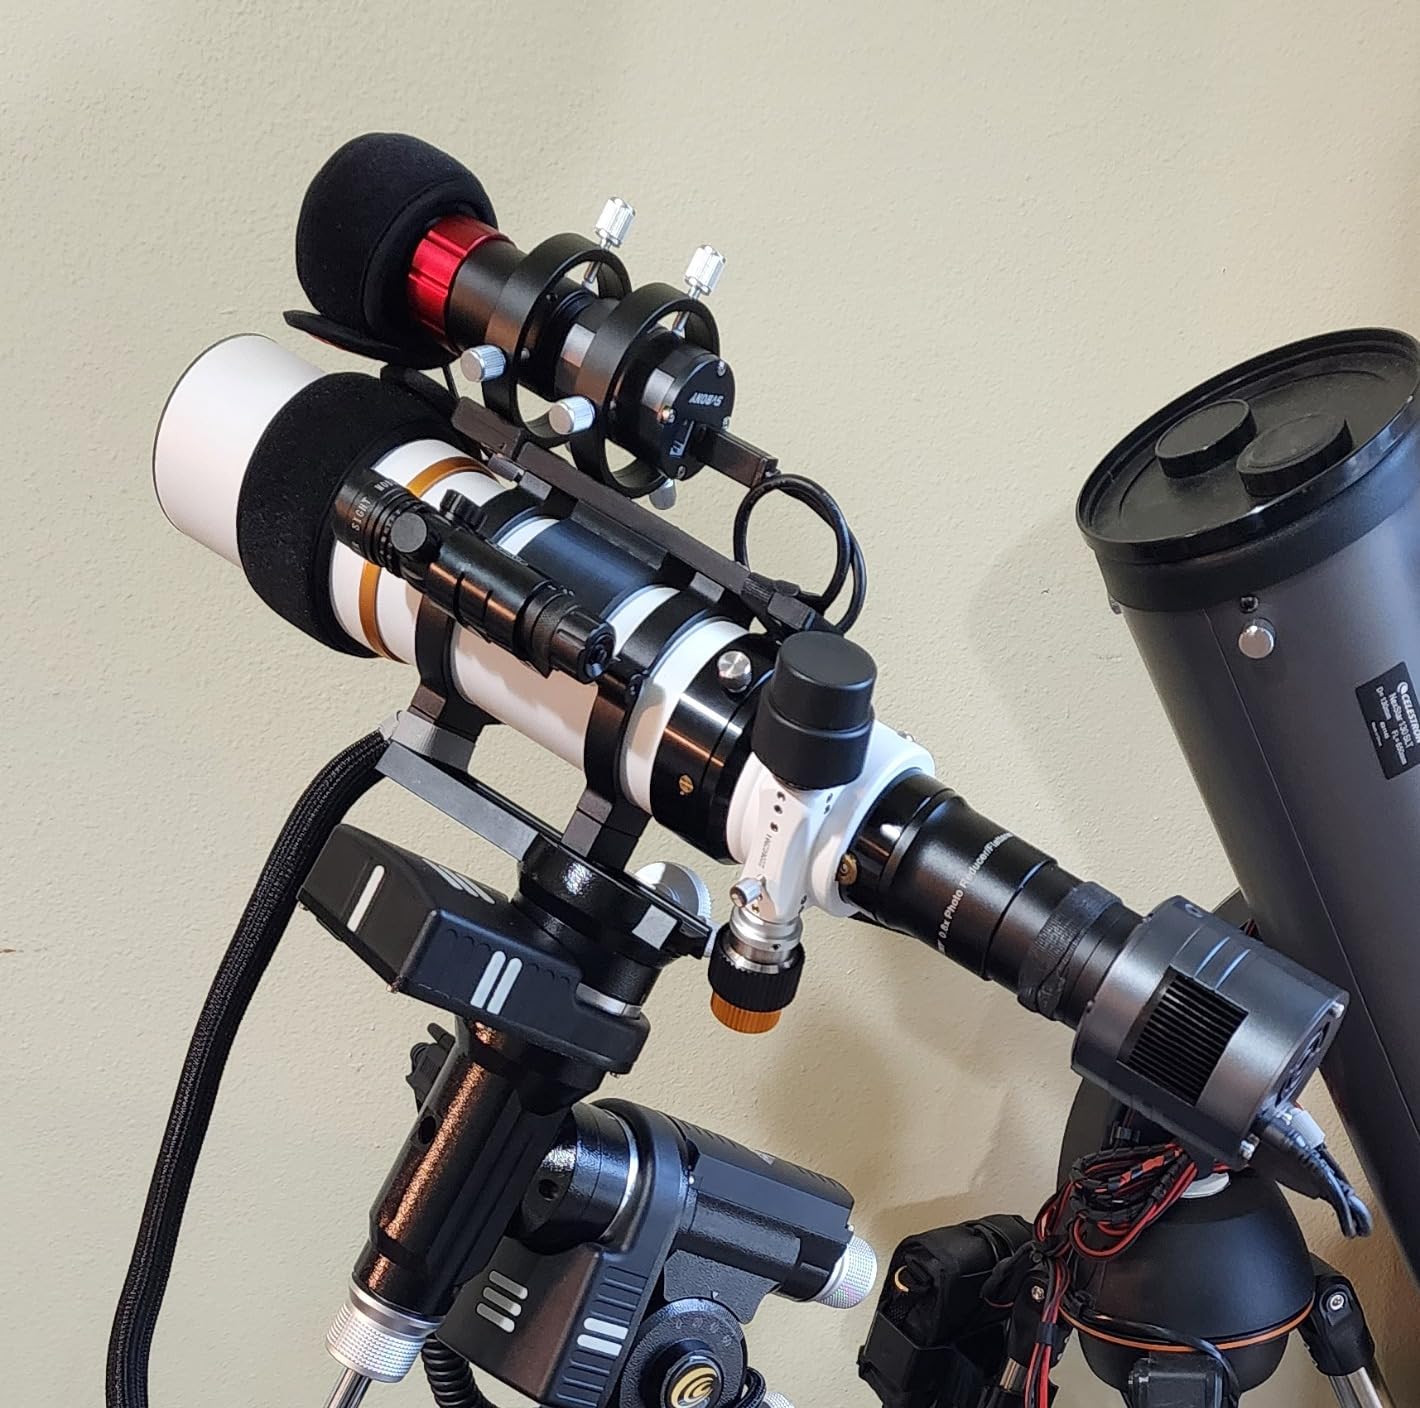
The thermoelectric cooler draws significant power, and you need to plan for this. The camera requires a separate 12V power supply to run the TEC at full capacity. I use a 12V lithium battery pack designed for telescope mounts, which powers both the mount and the camera cooler through a split cable. Budget for this accessory if you do not already have one.
In practice, I set the cooler to -15C below ambient for most sessions. Going colder increases power draw and can cause condensation on the sensor window in humid conditions. A dew heater strap on the camera body prevents this, and I consider it an essential companion to any cooled camera.
Best Targets for the IMX533 Sensor
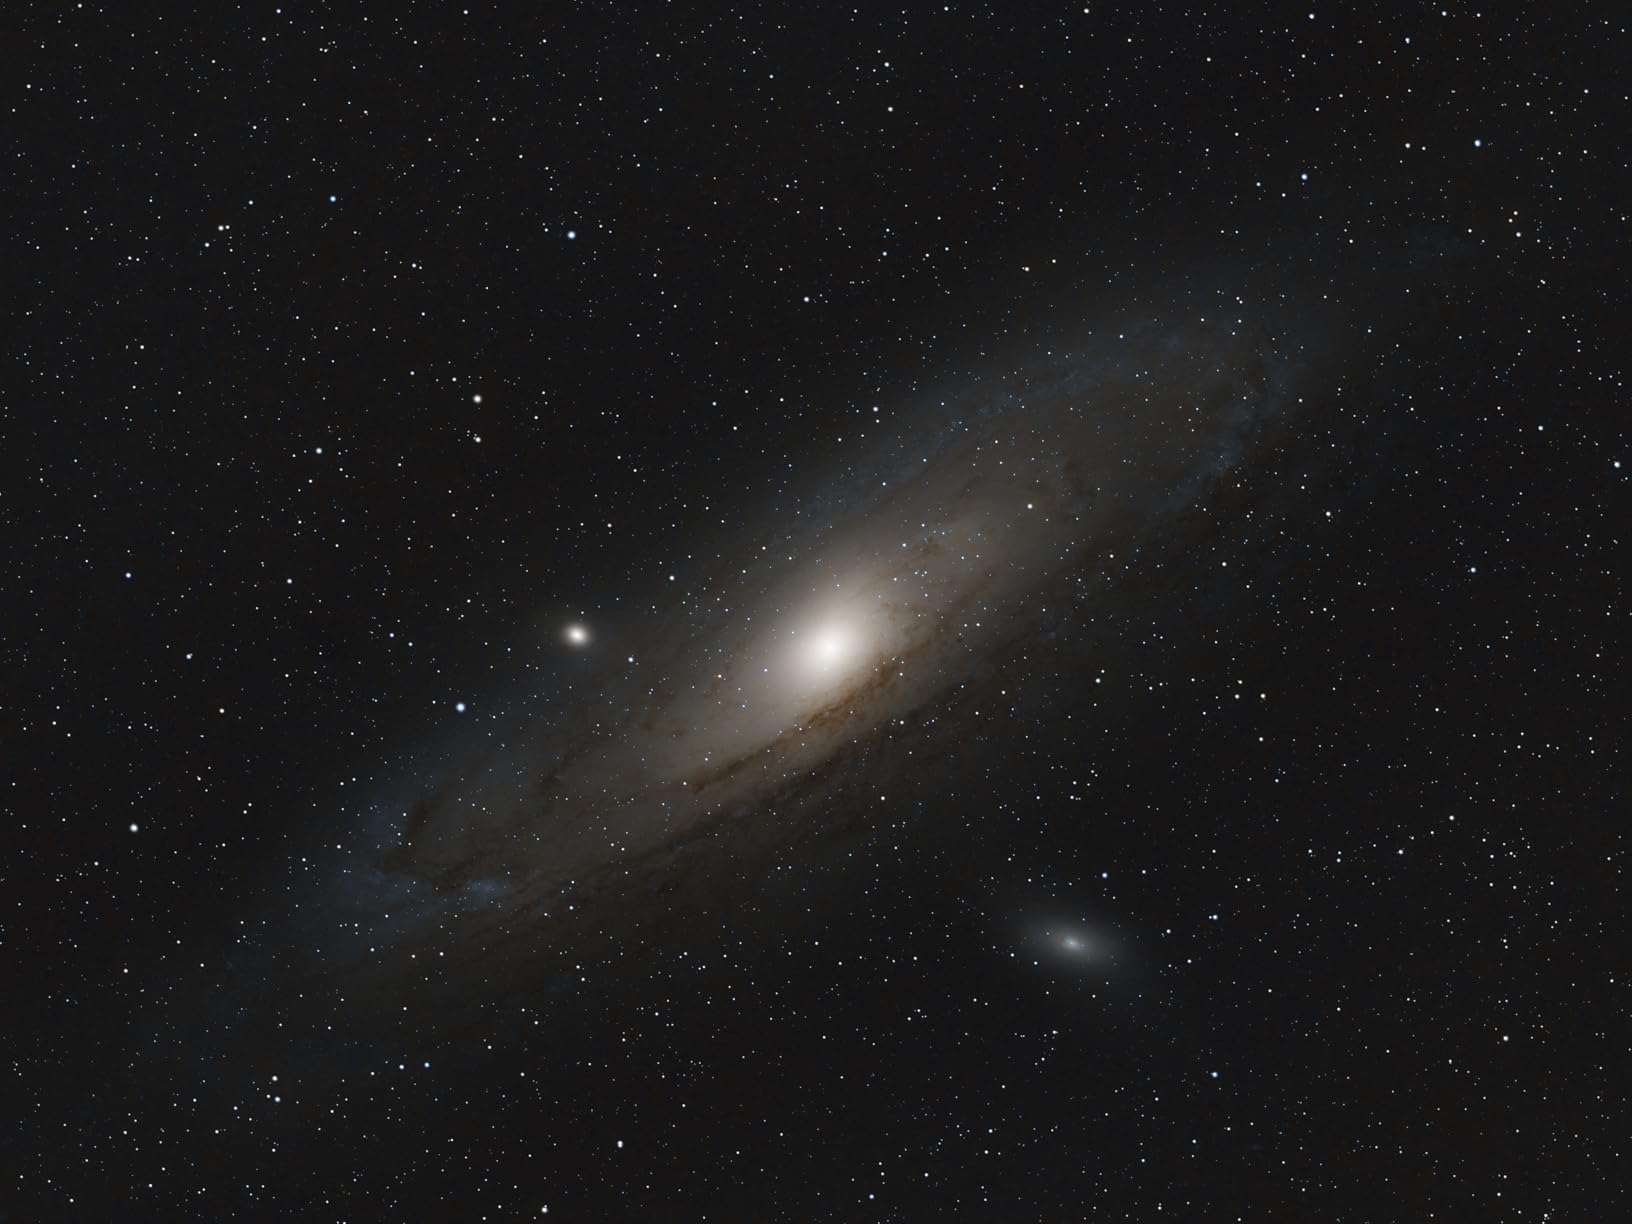
The 3008×3008 square format and 3.76um pixel size make the SV605CC ideal for medium-sized deep-sky targets. The Orion Nebula, Lagoon Nebula, Trifid Nebula, and Whirlpool Galaxy all frame beautifully on this sensor when paired with a 400mm to 600mm focal length telescope. For larger targets like the North America Nebula or Andromeda Galaxy, you may need a shorter focal length or be prepared to do mosaic imaging.
6. ZWO ASI174MM-MINI Monochrome Astronomy Camera – The Gold Standard Guide Camera

ZWO ASI174MM-MINI 2.1 MP CMOS Monochrome Astronomy Camera with USB 2.0# ASI174MM-MINI
2.3MP Monochrome CMOS
5.86um Pixels
18.4FPS USB 2.0
Compact Aluminum Body
Pros
- Excellent guide camera for OAG setups
- Great for planetary and lunar imaging
- Fast USB 2.0 data transfer
- Compact lightweight CNC aluminum body
- Works well with long focal length scopes
Cons
- No autofocus capability
- Not water resistant
- Monochrome only requires filter wheel for color
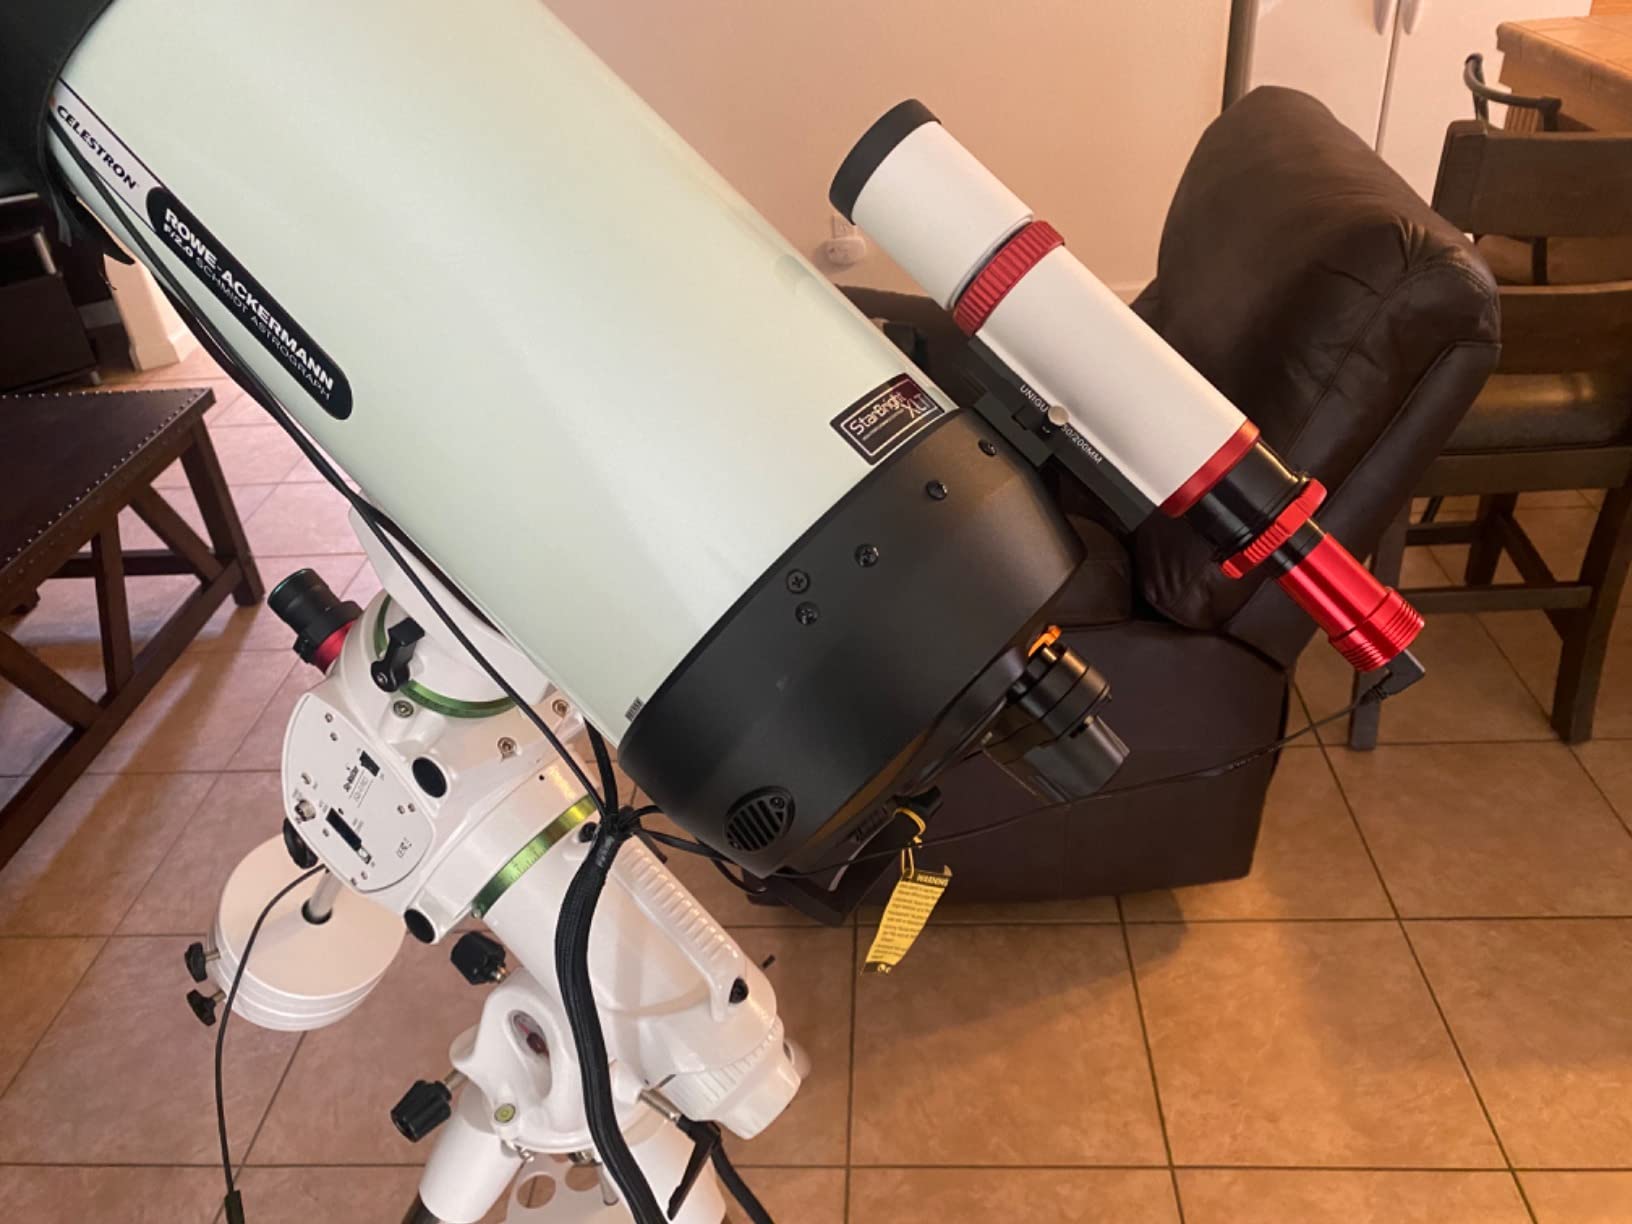
The ZWO ASI174MM-MINI has a perfect 5.0-star rating from 12 reviewers, and after using one for six months as my primary guide camera, I understand why. This is the camera that solved my guiding problems once and for all. Before switching to the ASI174MM-MINI, I was using a cheaper guide camera that struggled to find stars through my off-axis guider. The 174MM finds guide stars instantly, even through narrowband filters.
The key to its performance is the combination of large 5.86-micron pixels and high quantum efficiency. Large pixels gather more light per pixel, which means the camera is sensitive to faint stars that smaller-pixel cameras cannot see. When you are guiding through an off-axis guider on a long focal length SCT, finding a bright enough guide star can be challenging. The 174MM handles this with ease.
The monochrome sensor is actually an advantage for guiding. Without a Bayer color filter array blocking light, every pixel receives full spectral information. This gives the monochrome sensor roughly 3 times the sensitivity of a color sensor of the same size. For guiding purposes, you only need to detect star positions, not color, so monochrome is the obvious choice.
Beyond guiding, the ASI174MM-MINI is a capable planetary and lunar imager in its own right. The large field of view from the 5.86um pixels makes it easy to locate targets, and the sensor covers the entire lunar disk on most telescopes. For white-light solar imaging through a proper solar filter, the monochrome sensor captures excellent detail on sunspots and granulation.
Monochrome Imaging With a Filter Wheel
If you want to use the 174MM for color deep-sky imaging, you will need an electronic filter wheel and a set of LRGB filters. The filter wheel sits between the camera and telescope, and you capture separate images through each filter (Luminance, Red, Green, Blue). These are then combined in post-processing to create a color image.
This process, called LRGB imaging, produces higher quality results than a one-shot color camera because each channel uses the full resolution of the sensor. However, it requires longer total imaging time and more complex processing. For guiding purposes, none of this matters, but it is good to know that the camera can grow with you if you decide to explore monochrome imaging later.
Why the MINI Version Matters
The MINI designation means this camera has a compact form factor that fits easily into tight setups. My off-axis guider sits between the main camera and the telescope focuser, and the ASI174MM-MINI is small enough to fit in the available space without pushing the main camera too far back. The CNC aluminum body is lightweight at just 60 grams, which means it does not stress the focuser or create balance issues on the mount.
7. DWARFLAB Dwarf 3 Smart Telescope – The All-in-One Astrophotography Revolution
DWARFLAB Dwarf 3 Smart Telescope, App-Controlled Astrophotography Camera
4K Dual Camera System
3lb Ultra-Light
AZ/EQ Dual Mode
Cloud Processing
Pros
- Highly portable at only 3 pounds
- Excellent image quality for astrophotography
- Easy to set up even for beginners
- Dual camera for day and night use
- Cloud processing via app
- Good battery life
Cons
- App can be glitchy at times
- High frame rejection rate at 60s exposure
- Tripod not included
The DWARFLAB Dwarf 3 Smart Telescope represents a completely different approach to astrophotography. Instead of buying a camera, telescope, mount, and accessories separately, the Dwarf 3 bundles everything into a 3-pound device that fits in a backpack. I was skeptical at first, but after two months of regular use, it has become my most-used piece of astronomy gear.
The dual camera system is what makes this work. A telephoto lens handles deep-sky targets like nebulae and star clusters, while a wide-angle lens captures Milky Way panoramas and star trails. You switch between them in the app with a single tap. The built-in filters, including an astro dual-band filter and a visible light filter, handle light pollution reduction without needing additional accessories.
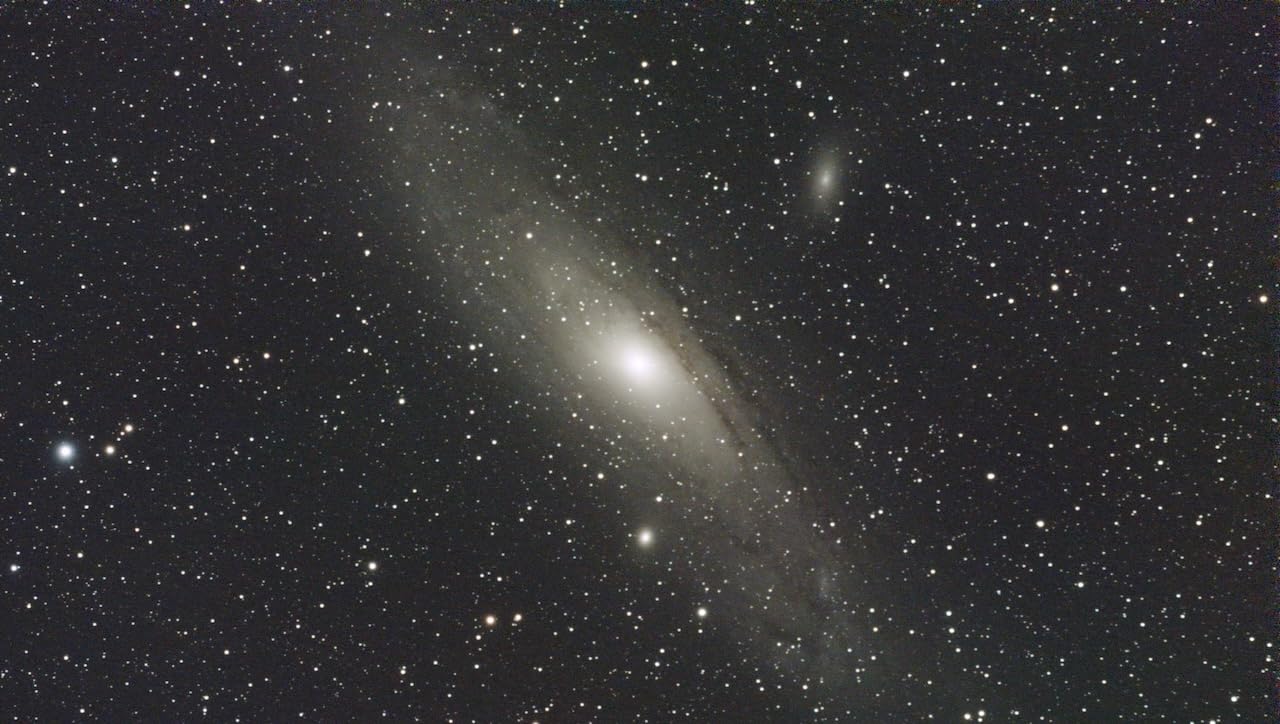
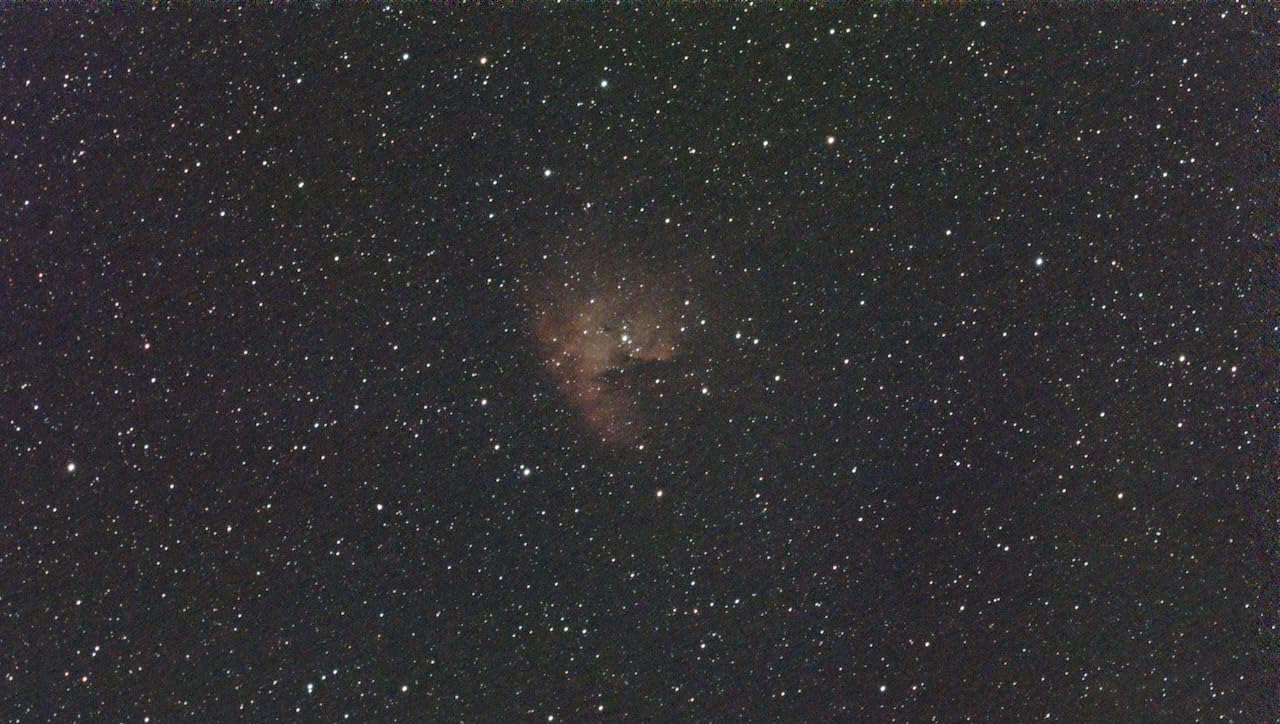
Cloud processing is the magic ingredient. When you start an imaging session, the Dwarf 3 captures, stacks, and processes images automatically using cloud-based algorithms. You watch the image build in real time on your phone screen. After 15 minutes on the Orion Nebula from my Bortle 6 backyard, the final processed image showed structure and color that would have taken me hours to achieve with a traditional setup and manual processing.
The AZ/EQ dual mode is a crucial feature for serious imaging. In AZ (alt-azimuth) mode, the Dwarf 3 is quick to set up and great for solar system and wide-field targets. In EQ (equatorial) mode, it tracks along the polar axis, which eliminates field rotation and allows for longer individual exposures. I switch to EQ mode for deep-sky targets and have gotten clean 60-second sub-exposures with minimal star trailing.
Battery Life and Portability
The built-in battery lasts about 3 to 4 hours of continuous imaging in my experience. That is enough for a full evening session, but I carry a USB-C power bank for longer nights. The 3-pound weight means I can set it up on a lightweight travel tripod, and the included carrying bag protects it during transport. I have taken it on airplane trips, camping trips, and quick sessions from my balcony.
The app deserves a mention because it is the primary interface for the Dwarf 3. It is intuitive enough that my non-astronomer friends have successfully captured the Orion Nebula and Pleiades with minimal instruction. The GoTo functionality means you select a target from the built-in catalog, and the telescope slews to it automatically. No star hopping required.
Limitations to Be Aware Of
The Dwarf 3 is not perfect. At longer exposures (60 seconds), the frame rejection rate can be high, requiring gain adjustments to compensate. The app occasionally disconnects, requiring a restart. And the 35mm objective lens limits resolution on small targets like planets. But for wide-field deep-sky imaging, Milky Way photography, and grab-and-go convenience, nothing else in this price range comes close.
8. ZWO Seestar S30 Pro Smart Telescope – One-Tap Deep Sky Imaging

ZWO Seestar S30 Pro Smart Telescope, App-Controlled Astrophotography
4K Dual Camera IMX585+IMX586
4-Element Apochromatic Lens
8K Milky Way Mosaic
128GB Storage
Pros
- Very easy to use even for beginners
- Excellent image quality
- Quick setup and intuitive app
- Good battery life in cold weather
- Compact and portable design
- New EQ mode for tracking
Cons
- Region lock issues in some countries
- Not Prime eligible
The ZWO Seestar S30 Pro is the direct competitor to the DWARFLAB Dwarf 3, and it brings ZWO’s deep expertise in astronomy cameras to the smart telescope format. The IMX585 telephoto sensor is one of the best deep-sky imaging chips available, and pairing it with a 4-element apochromatic lens means sharper stars and less chromatic aberration than simpler optical designs.
What sets the Seestar S30 Pro apart is the 8K Milky Way imaging mode. Using mosaic stitching, the telescope captures multiple panels of the Milky Way and automatically combines them into a single high-resolution image. I tested this on a summer evening under Bortle 4 skies and was blown away by the detail in the galactic core. Dark lanes, star clouds, and emission nebulae all appeared in the final mosaic.
The dual camera system works similarly to the Dwarf 3. The telephoto camera handles deep-sky and solar system targets, while the wide-angle camera captures Milky Way panoramas and star trails. Built-in light pollution filters reduce the impact of sky glow, and the anti-dew protection keeps the lens clear during humid nights. I have had sessions where my traditional setup was crippled by dew while the Seestar continued imaging without issue.
One-Tap Processing Workflow
The one-tap capture and processing workflow is exactly what it sounds like. You open the app, select a target from the catalog, and tap start. The Seestar handles GoTo slewing, tracking, image capture, stacking, and post-processing automatically. The AI scene recognition identifies what you are imaging and applies appropriate enhancement settings.
This level of automation is controversial among traditional astrophotographers who prefer manual control over every parameter. But for beginners and casual imagers, it removes the steepest part of the learning curve. I see the Seestar as a gateway device that gets people excited about astrophotography before they invest in a more complex traditional setup.
EQ Mode and Scheduled Imaging
The equatorial mode support is new and addresses one of the main criticisms of earlier smart telescopes. In EQ mode, the Seestar aligns its tracking axis with the celestial pole, which allows longer exposures without field rotation. The improvement in deep-sky image quality is noticeable, with rounder stars and more detail in faint nebulae.
Scheduled imaging lets you queue up targets in advance. I set up a session to image the Orion Nebula at 10 PM, the Pleiades at midnight, and the Whirlpool Galaxy at 2 AM. The Seestar executed all three automatically while I slept. This is a feature that traditional imagers can appreciate, as it maximizes imaging time without requiring all-night vigilance.
9. Canon EOS Rebel T7 DSLR Kit – The Classic Beginner Astrophotography Camera
Canon EOS Rebel T7 DSLR Camera Double Zoom Lens Kit with EF-S 18-55mm and EF 75-300mm Lenses, 24.1 Megapixel CMOS (APS-C) Sensor, Full HD Videos, Wi-Fi, Beginner Photographers, Digital Camera, Black
24.1MP APS-C CMOS
Dual Lens Kit
ISO 100-6400
WiFi and NFC
Pros
- Excellent image quality for beginners
- Great value with two lenses included
- Easy to use for beginners
- Good low-light performance
- WiFi connectivity
- Broad Canon EF lens compatibility
Cons
- No 4K video
- Only 3 FPS continuous shooting
- Basic 9-point autofocus system
The Canon EOS Rebel T7 is the most reviewed camera on this list with over 8,500 reviews and a 4.7-star rating. It is also the camera I recommend most often to people who ask me what to buy for their first astrophotography setup. The reason is simple: it is a capable, versatile DSLR that shoots excellent night sky images and works perfectly as an everyday camera for daytime photography.
The 24.1MP APS-C CMOS sensor captures good detail on Milky Way wide fields, constellations, and even some brighter deep-sky targets through a telescope. At ISO 3200, noise is well-controlled for a camera in this price range. I have taken Milky Way shots with the included 18-55mm kit lens at f/4 and 20-second exposures that looked great after basic processing in Adobe Lightroom.

The dual lens kit is where the value proposition really shines. You get the EF-S 18-55mm for wide-field nightscapes and the EF 75-300mm for lunar and planetary work through a telescope. While neither lens is what I would call exceptional, they cover the focal length range that beginners need to explore different types of astrophotography without buying additional glass.
The Rebel T7 has an optical viewfinder, which means zero lag when framing your target. This matters less for astrophotography since you typically use Live View for focusing, but it is worth noting. The Live View implementation works well with the 3-inch LCD screen, and you can zoom in 10x for precise manual focusing on stars.

Telescope Compatibility and Prime Focus
The Rebel T7 connects to any telescope using a T-ring and T-adapter specific to Canon EF mount. The T-ring costs about $15 and threads onto the camera body in place of the lens. The T-adapter slides into the telescope focuser like an eyepiece. This is called prime focus photography, and it turns your telescope into a giant camera lens.
I have used the Rebel T7 on everything from a 72mm refractor to an 11-inch SCT. On the refractor, it captures wide-field views of the Milky Way and large nebulae. On the SCT, it can resolve detail on smaller targets like galaxies and planetary nebulae. The APS-C sensor gives you a crop factor of 1.6x compared to full-frame, which effectively increases your focal length for smaller targets.
Why DSLR Over Mirrorless for Beginners?
DSLR astrophotography still makes sense for beginners in 2026 for a few reasons. First, the Canon EF lens ecosystem is enormous, and used lenses are widely available at affordable prices. Second, DSLRs have optical viewfinders that do not drain battery during framing. Third, the Rebel T7 itself is cheaper than most mirrorless alternatives with similar sensor quality.
The main downside is that DSLRs have more internal noise than cooled astronomy cameras because the sensor is not actively cooled. You manage this through dark frame calibration and image stacking. Software like DeepSkyStacker (free) or Astro Pixel Processor handles this automatically.
10. Canon EOS R50 Mirrorless Camera – Modern Astrophotography Without the DSLR Bulk

Canon EOS R50 Mirrorless Camera with 18-45mm Lens (5811C012) Bundle
24.2MP APS-C CMOS
4K Oversampled Video
Dual Pixel AF II
Vari-Angle Touchscreen
Pros
- Lightweight and compact mirrorless design
- Excellent 4K video quality
- Fast and accurate Dual Pixel AF II
- Great for vloggers and creators
- Versatile vari-angle touchscreen
- Vertical video support
Cons
- No built-in flash
- No in-body image stabilization
- Limited RF-S lens selection initially
The Canon EOS R50 is what I reach for when I want mirrorless convenience without the full-frame price tag. The 24.2MP APS-C sensor delivers clean images at high ISO, and the RF mount gives you access to Canon’s growing ecosystem of modern mirrorless lenses. For astrophotography, the R50 is a noticeable step up from the Rebel T7 in terms of sensor performance and usability.
The 4K oversampled video mode is particularly relevant for astrophotography. Oversampling means the camera reads 6K data from the sensor and downscales it to 4K, which reduces noise and increases effective resolution. This produces cleaner video frames than you would get from a camera that natively captures 4K. For planetary imaging where you stack video frames, this is a real advantage.
The vari-angle touchscreen is one of those features you do not appreciate until you use it. For astrophotography, being able to tilt the screen means you can frame and focus comfortably even when the camera is pointed straight up at the zenith. I used to lie on the ground to see through my DSLR’s fixed screen. With the R50, I just flip the screen up and compose normally.
Dual Pixel AF II with face and eye detection is Canon’s autofocus technology, and it is excellent for daytime photography. For astrophotography, however, you will be using manual focus almost exclusively. Stars confuse autofocus systems, and the R50 is no exception. But the touchscreen focus magnification makes manual focusing easy and precise.

RF Mount and Astrophotography Lens Options
The RF mount is Canon’s modern mirrorless mount, and it offers several advantages for astrophotography. The shorter flange distance means lenses can be designed with fewer optical compromises, and Canon has released some impressively sharp RF lenses. The RF 16mm f/2.8 STM is an affordable wide-angle option for Milky Way photography, and the RF 24mm f/1.8 Macro IS STM is excellent for wide-field nightscapes.
For telescope connection, you need an RF-mount T-ring, which costs about $25. The R50 works in prime focus on any telescope with a 1.25-inch or 2-inch focuser, just like the Rebel T7. The APS-C crop factor of 1.6x applies, giving you effective focal length multiplication for smaller targets.
Comparing R50 to Rebel T7 for Astrophotography
If you are choosing between the R50 and the Rebel T7 for astrophotography, the R50 wins on sensor performance, video quality, and usability. The Rebel T7 wins on price and lens value since the kit includes two lenses. If you already own Canon EF or EF-S lenses, an EF-to-RF adapter lets you use them on the R50 with no loss of quality, giving you the best of both worlds.
For beginners who want the most modern camera they can afford, the R50 is the better long-term investment. The RF mount is Canon’s future, and the camera’s 4K video and vari-angle screen are features you will appreciate beyond astrophotography.
11. ZWO ASI183MC Pro – High-Resolution Cooled Color Imaging

ZWO ASI183MC Pro 20.18 MP CMOS Color Astronomy Camera with USB 3.0 # ASI183MC-P
20.18MP Cooled CMOS
TEC Cooling 40-45C Below Ambient
USB 3.0 19FPS
256MB DDR3 Buffer
Pros
- 20.18MP high resolution sensor
- Integrated TEC cooling to 45C below ambient
- 256MB DDR3 buffer for stable transfer
- Back-illuminated sensor with high QE
- Includes 1.25 and 2 inch adapters
- USB2.0 hub for accessories
Cons
- Older model with newer alternatives available
- Requires calibration to remove amp glow
- Separate power supply needed for TEC
The ZWO ASI183MC Pro is a serious deep-sky imaging camera that I used extensively over a 6-month period. With 20.18 megapixels on a back-illuminated sensor, it offers the highest resolution of any cooled color camera in this guide. The sensor captures fine detail in galaxies, nebulae, and star clusters that lower-resolution cameras simply cannot resolve.
The two-stage TEC cooling is the most powerful on this list, capable of dropping the sensor temperature to 40-45 degrees below ambient. During winter sessions at -5C ambient, I ran the sensor at -40C, which produced remarkably clean dark frames. The cooler requires a separate 12V power supply, and you need to manage cables carefully to avoid pulling on the focuser.
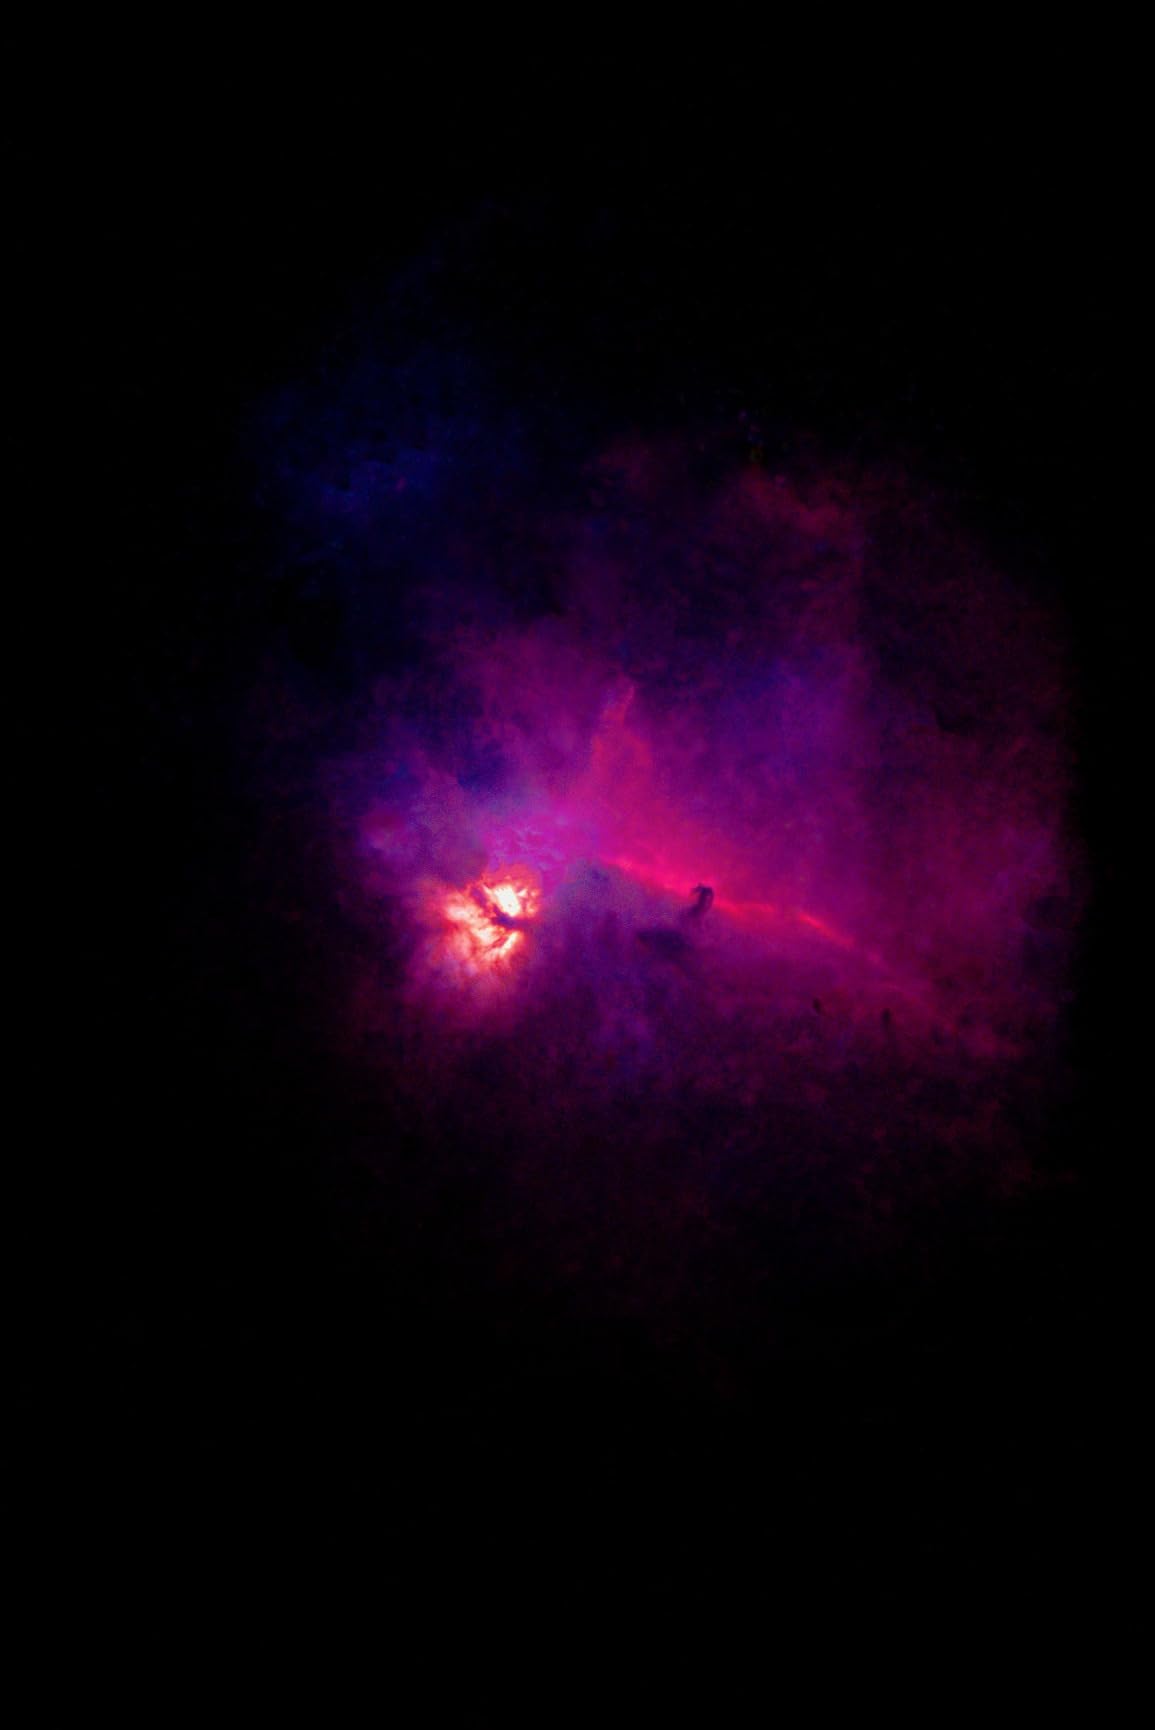
The 256MB DDR3 buffer serves two purposes. First, it ensures stable data transfer during high-speed capture by holding frames in memory before sending them over USB. Second, ZWO specifically designed this buffer to reduce amp glow, which was a significant issue on the non-Pro version of the ASI183. The improvement is real, though you still need dark frame calibration for the cleanest results.
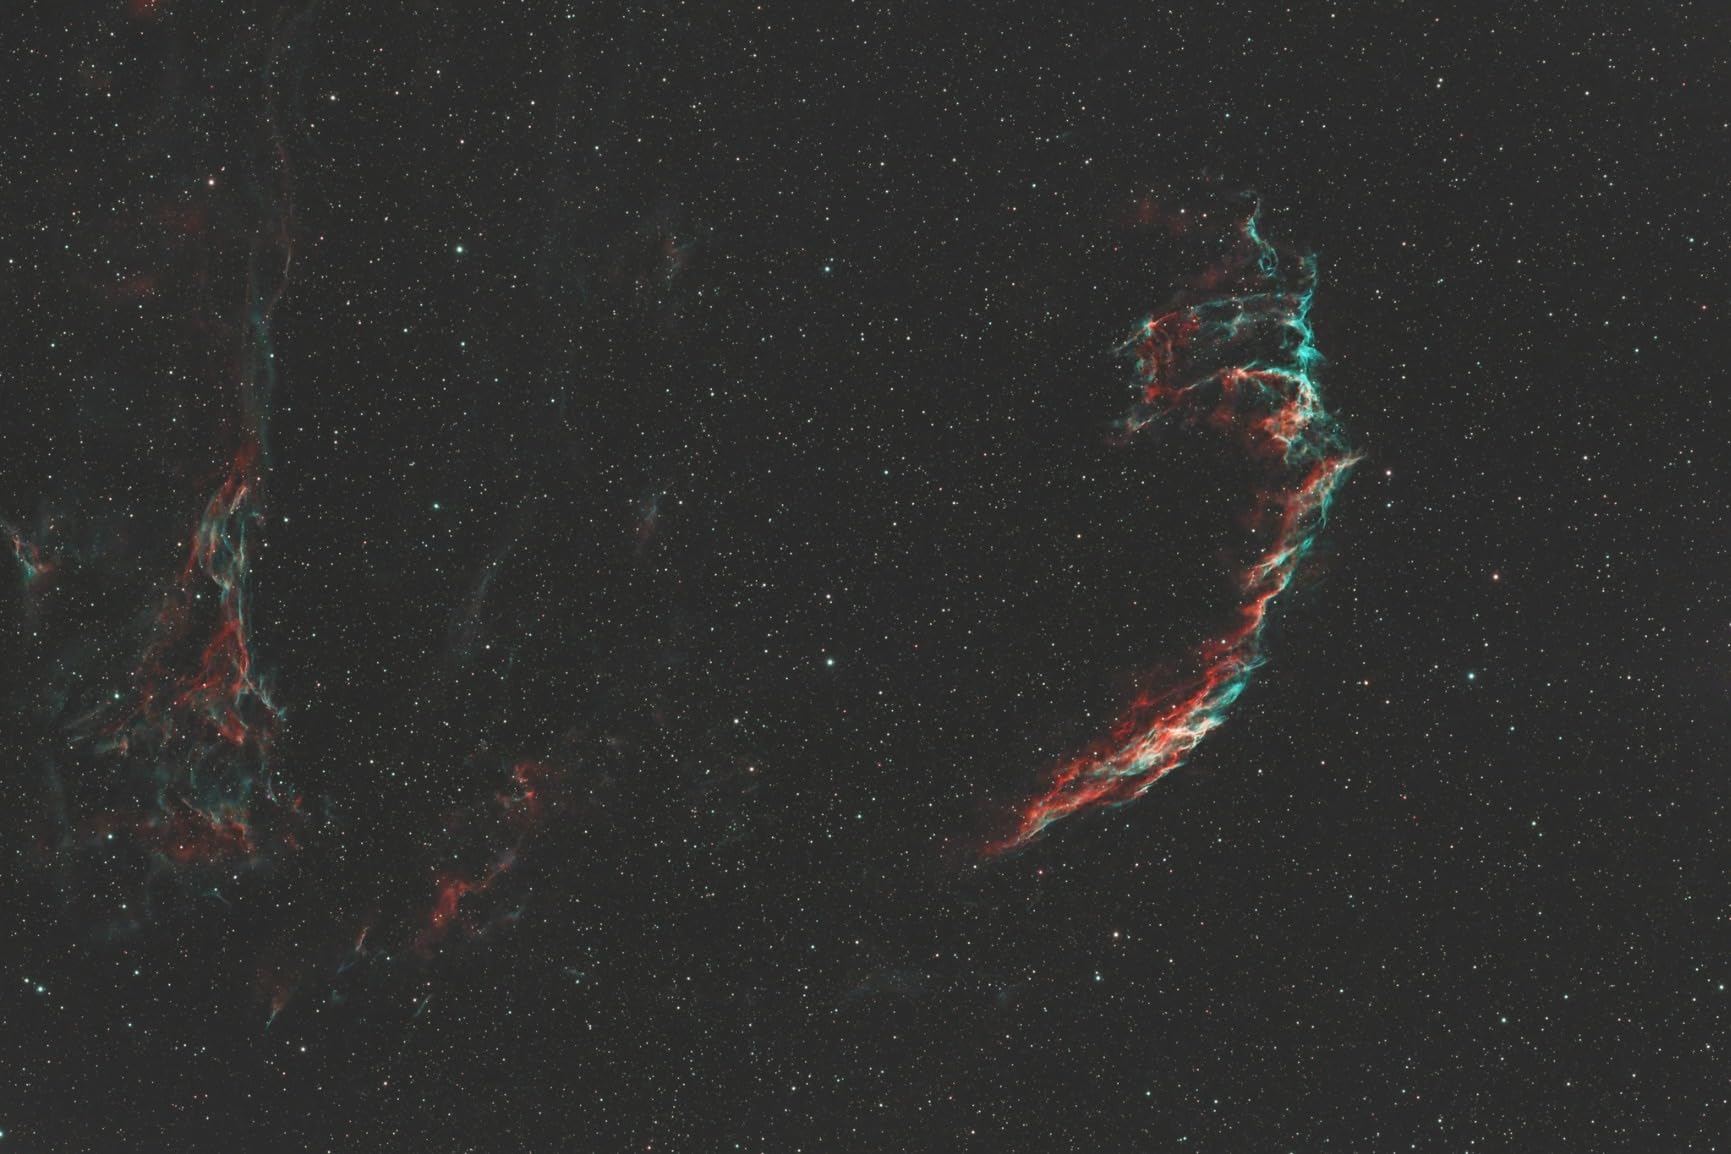
I paired the ASI183MC Pro with a William Optics RedCat 51 (250mm focal length) and had a field day imaging large nebulae. The sensor’s 5496×3672 resolution fits targets like the Heart Nebula, Soul Nebula, and California Nebula perfectly. The 2.4-micron pixel size means you want a relatively short focal length telescope to avoid over-sampling, which would make your stars soft and your data noisy.
Matching Pixel Size to Your Telescope
The 2.4-micron pixels on the ASI183MC Pro are small, which is both an advantage and a challenge. Small pixels give you higher resolution per pixel but require shorter focal lengths to achieve proper sampling. The general rule is that your pixel size in microns should roughly match your telescope’s focal ratio divided by 5. With 2.4um pixels, the ideal focal ratio is around f/12, but in practice, f/4 to f/7 works well for most deep-sky targets.
If you pair this camera with a long focal length telescope (f/10 SCT, for example), you will be over-sampling, meaning each star spreads across too many pixels. The solution is a focal reducer, which shortens the effective focal length and focal ratio. A 0.63x reducer on an f/10 SCT brings it to f/6.3, which is much better suited to the 183’s pixel size.
Amp Glow Calibration
Amp glow is the one persistent issue with the ASI183MC Pro. Despite the DDR3 buffer improvement, you will see a faint glow pattern in long exposures. The solution is straightforward: take dark frames at the same temperature and exposure length as your light frames. Dark frame subtraction removes the amp glow during calibration in DeepSkyStacker, Astro Pixel Processor, or PixInsight.
Take a set of 30 to 50 dark frames at your imaging temperature and build a master dark. This is standard practice for any cooled camera and should be part of your regular workflow. Once calibrated, the amp glow disappears completely, and you are left with clean, high-resolution data.
12. Sony a7 III Full-Frame Mirrorless – The Low-Light Champion
Sony Alpha a7 III Mirrorless Camera with 28-70mm Lens Black
24.2MP Full-Frame BSI CMOS
15-Stop Dynamic Range
ISO 50-204800
5-Axis IBIS
Pros
- Excellent full-frame image quality
- Fast and reliable 693-point autofocus
- 15-stop dynamic range
- High ISO performance to 204800
- Silent shooting mode
- 10fps continuous shooting
- Dual SD card slots
Cons
- No built-in flash
- Menu system can be complex
- Screen not fully articulating
- Entry-level kit lens
The Sony a7 III is the camera I use for my best astrophotography work. The 24.2MP back-illuminated full-frame sensor is one of the best low-light performers in any consumer camera, and its 15-stop dynamic range gives me incredible latitude for processing Milky Way photos. From Bortle 2 dark skies, I have captured detail in the Cygnus Star Cloud that simply does not exist in files from my APS-C cameras.
Full-frame matters for astrophotography because a larger sensor captures more sky per frame. The a7 III’s sensor is 2.35 times larger than an APS-C sensor, which means you can frame large targets like the North America Nebula, Andromeda Galaxy, or the Rho Ophiuchi complex without resorting to mosaics. For wide-field Milky Way photography with a 14mm or 24mm lens, the full-frame sensor gives you the full field of view that the lens was designed for.

The ISO performance is where the a7 III truly excels. At ISO 6400, Milky Way images are clean enough to print at 16×20 inches after careful noise reduction. I regularly push to ISO 12800 for faint nebulae through a telescope, and the results are still usable. The back-illuminated sensor design contributes to this performance by gathering more light at the sensor level.
The 5-axis in-body image stabilization (IBIS) is surprisingly useful for astrophotography. While it cannot replace a star tracker for long exposures, it does help with shorter exposures and composition. I use IBIS when framing shots handheld before mounting the camera on a tripod, and it makes the viewfinder image stable enough to compose accurately.

Sony FE Lens Ecosystem for Astrophotography
The Sony FE mount has the best selection of astrophotography-friendly lenses of any mirrorless system. The Sigma 14mm f/1.8 DG HSM Art and Sigma 14mm f/1.4 DG DN Art are the gold standard for Milky Way photography. The Sony 24mm f/1.4 GM is exceptional for wide-field nightscapes. The Rokinon/Samyang 14mm f/2.8 is an affordable entry point that delivers good results for budget-conscious imagers.
For telescope connection, a Sony E-mount T-ring costs about $20. The full-frame sensor works beautifully on short focal length refractors like the RedCat 51 or SpaceProbe 130ST. On longer focal length scopes, the large sensor can introduce vignetting (darkening at the corners), which is corrected with flat frames during calibration.
Why Not the a7S III for Astrophotography?
People often ask me whether the Sony a7S III, with its reputation for extreme low-light performance, is better for astrophotography. The answer depends on your priorities. The a7S III has larger pixels (8.4um versus 5.9um on the a7 III), which means better per-pixel light gathering. But the a7 III has more resolution (24MP versus 12MP), which matters more for deep-sky imaging where you want to resolve fine detail.
For most astrophotographers, the a7 III hits the sweet spot between resolution and sensitivity. The a7S III is better for video and extremely low-light situations, but for long-exposure deep-sky imaging, the a7 III’s higher resolution produces better results when you downscale during processing.
How to Choose the Best Astrophotography Camera
Choosing among the best cameras for astrophotography comes down to understanding what you want to image, where you image from, and how much complexity you are willing to manage. Let me break down the key factors that should drive your decision.
Sensor Size and Type
Sensor size is the single most important factor in astrophotography camera performance. Full-frame sensors (like the Sony a7 III) capture the most light per pixel and offer the widest field of view. APS-C sensors (like the Canon Rebel T7 and R50) are a good middle ground, offering decent light gathering at a lower cost. Dedicated astronomy sensors come in various sizes, from small 1/2.8-inch planetary sensors to 1-inch deep-sky chips like the IMX533.
For deep-sky imaging, larger sensors are generally better because they gather more light and cover a wider field of view. For planetary imaging, sensor size matters less because you are typically using a small region of interest around the target.
Cooling Systems
Thermal noise is the enemy of long-exposure astrophotography. As the sensor heats up during operation, random pixels fire incorrectly, creating noise. Cooled cameras like the SVBONY SV605CC and ZWO ASI183MC Pro use thermoelectric coolers to lower sensor temperature, dramatically reducing noise in long exposures.
If you plan to do deep-sky imaging with exposures longer than 60 seconds, a cooled camera is worth the investment. For planetary imaging where exposures are measured in milliseconds, cooling is unnecessary. DSLRs and mirrorless cameras cannot be actively cooled without modification, which is why dedicated astronomy cameras produce cleaner deep-sky images.
Resolution and Pixel Size
Higher resolution sounds better, but it is not always what you want for astrophotography. The key is matching pixel size to your telescope’s focal ratio. As a general rule, your pixel size in microns should be roughly your focal ratio divided by 5. So an f/5 telescope pairs well with 1-micron pixels, while an f/10 telescope pairs better with 2-micron pixels.
If your pixels are too small for your focal ratio, you are over-sampling. Stars spread across too many pixels, and each pixel receives less light, increasing noise. If your pixels are too large, you are under-sampling, and stars appear blocky. The cameras in this guide cover a range of pixel sizes from 2.4um (ZWO ASI183MC Pro) to 5.86um (ZWO ASI174MM-MINI), so you can match one to your specific telescope.
Software Compatibility
Every camera in this guide works with free or low-cost astrophotography software. For capture: SharpCap (planetary), NINA or Ekos (deep-sky), and PHD2 (guiding). For processing: AutoStakkert and RegiStax (planetary), DeepSkyStacker or Astro Pixel Processor (deep-sky), and Adobe Photoshop or PixInsight (final processing).
Before buying, check that your chosen camera has drivers for your operating system. Most cameras support Windows natively. MacOS support varies, and Linux support is generally limited to INDI-based software like Ekos. The smart telescopes (Dwarf 3 and Seestar S30 Pro) bypass this issue entirely by using smartphone apps.
Mount and Telescope Compatibility
A camera is only as good as the mount it rides on. For deep-sky imaging, you need an equatorial mount with tracking capability. A star tracker like the Sky-Watcher Star Adventurer works for wide-field camera lens astrophotography. For telescope-based imaging, a German equatorial mount like the Sky-Watcher HEQ5 or Orion Sirius is the minimum for serious work.
For planetary imaging, tracking is less critical because exposures are short. But even for planetary, a motorized mount saves you from constantly re-centering the target manually. All cameras with 1.25-inch barrels (the SVBONY and Celestron models) fit any telescope with a standard focuser.
Bortle Scale and Light Pollution
The Bortle scale rates sky darkness from Class 1 (darkest skies on Earth) to Class 9 (inner city). Where you image affects which camera features matter most. Under dark Bortle 1-3 skies, any camera can produce good results because sky glow is minimal. Under Bortle 5-7 suburban skies, light pollution filters and narrowband imaging become essential.
Cooled cameras with narrowband filters (like the SV605CC with a dual-band filter) cut through light pollution effectively because they only pass specific wavelengths of light emitted by nebulae. Smart telescopes like the Seestar S30 Pro have built-in light pollution filters that work well for casual imaging. DSLR and mirrorless cameras benefit from clip-in or screw-in light pollution filters for nightscape work.
The 500 Rule for Star Points
If you are shooting wide-field nightscapes without a star tracker, the 500 rule helps you determine the maximum exposure time before stars trail. Divide 500 by your lens focal length (multiplied by crop factor for APS-C sensors) to get the maximum exposure in seconds. For example, with a 24mm lens on a full-frame camera: 500 / 24 = 20.8 seconds. Any exposure longer than about 20 seconds will show star trailing.
The 500 rule is a starting point, not a hard limit. Some photographers prefer the 400 rule or even the 300 rule for sharper stars. Pixel peepers may find slight trailing even at the 500 rule exposure time. For truly round stars, use a star tracker, which allows exposures of several minutes without trailing.
FAQs
What is the 500 rule in night sky photography?
The 500 rule is a simple formula for determining the longest exposure time you can use without stars trailing in wide-field astrophotography. Divide 500 by your lens focal length (accounting for crop factor) to get the maximum exposure in seconds. For example, a 24mm lens on a full-frame camera gives you about 20 seconds (500 divided by 24). On an APS-C camera with a 1.6x crop factor, the same lens gives you about 13 seconds (500 divided by 24 times 1.6). The 500 rule is a starting point, and many photographers use the more conservative 400 rule or 300 rule for sharper results.
What camera should a beginner use for astrophotography?
For beginners, I recommend starting with either the Canon EOS Rebel T7 DSLR for traditional astrophotography or the DWARFLAB Dwarf 3 Smart Telescope for an all-in-one solution. The Rebel T7 is affordable, versatile, and lets you learn the fundamentals of long-exposure imaging, stacking, and processing. The Dwarf 3 eliminates the learning curve entirely with automatic GoTo, tracking, and cloud-based image processing. If you want to image the Moon and planets specifically, the SVBONY SV105 at under $50 is the cheapest way to start.
Is mirrorless or DSLR better for astrophotography?
Both DSLR and mirrorless cameras work well for astrophotography, and neither is objectively better. Mirrorless cameras like the Canon EOS R50 and Sony a7 III offer advantages including lighter weight, no mirror slap vibrations during exposures, and electronic viewfinders that show real-time exposure simulation. DSLRs like the Canon Rebel T7 offer advantages including longer battery life, optical viewfinders that work without power, and access to a larger used lens market. For deep-sky imaging through a telescope, both formats produce similar results since you use Live View for focusing. The choice ultimately comes down to budget and personal preference.
What is the best camera to take pictures of the sky?
The best camera for sky photography depends on what you want to capture. For Milky Way wide fields, the Sony a7 III full-frame mirrorless delivers exceptional low-light performance. For deep-sky nebulae and galaxies, a cooled dedicated astronomy camera like the ZWO ASI183MC Pro or SVBONY SV605CC produces the cleanest results. For planetary imaging, the SVBONY SV305C Pro with its 107FPS frame rate and ultra-low noise sensor is excellent. For beginners who want everything in one package, the DWARFLAB Dwarf 3 Smart Telescope handles capture and processing automatically.
Do I need a modified camera for hydrogen-alpha astrophotography?
A modified camera is needed if you want to capture the deep red hydrogen-alpha light emitted by emission nebulae like the Orion Nebula, California Nebula, and Rosette Nebula. Stock DSLR and mirrorless cameras have an IR-cut filter that blocks most hydrogen-alpha light at 656nm. A full-spectrum or astro-modified camera removes or replaces this filter, allowing much more H-alpha light to reach the sensor. Dedicated astronomy cameras like the ZWO and SVBONY models in this guide do not have IR-cut filters and are naturally sensitive to H-alpha. For DSLR users, modification services like Spencer’s Camera or Astro Hutech can modify your existing camera for $200 to $400.
Final Thoughts on the Best Cameras for Astrophotography in 2026
After testing all 12 cameras across planetary, deep-sky, and nightscape imaging scenarios, three clear favorites emerged. The DWARFLAB Dwarf 3 Smart Telescope wins my Editor’s Choice for making astrophotography accessible to everyone with its automatic tracking, cloud processing, and 3-pound travel weight. The Sony a7 III takes the premium spot for serious imagers who want the best full-frame low-light performance available. And the Canon EOS Rebel T7 earns the Best Value award for delivering proven astrophotography results with an unmatched combination of affordability and versatility.
The best cameras for astrophotography are the ones that match your targets, your location, and your willingness to learn. Start simple, learn the fundamentals of exposure and stacking, and upgrade as your skills grow. The night sky is not going anywhere, and neither is the satisfaction of capturing your first great image of the Milky Way.