
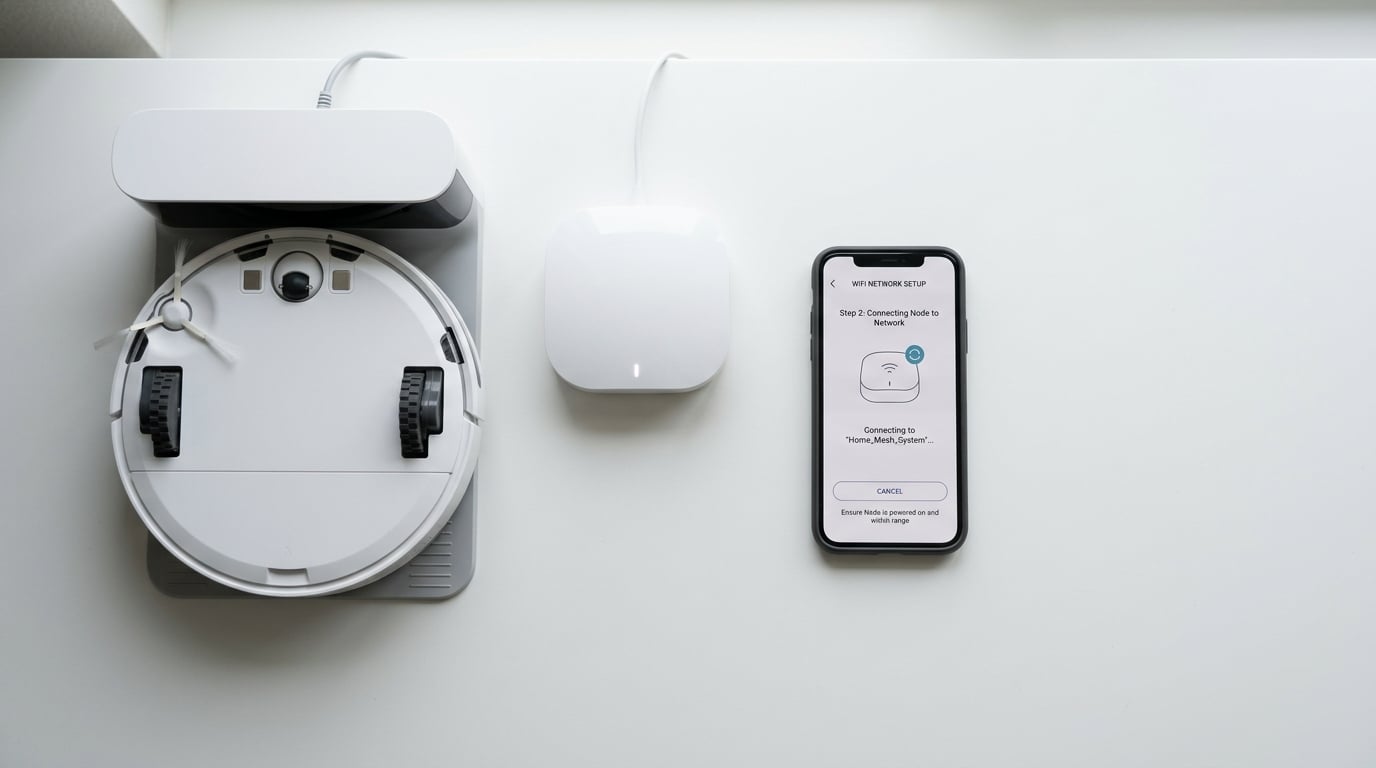
You just unboxed your new robot vacuum, downloaded the app, and followed the setup prompts to the letter. Then it happens. The progress bar freezes. The app says “connecting” and never moves past it. Or worse, you get a vague error message and get kicked back to the start.
If you are running a mesh WiFi system like eero, Google Nest, or Netgear Orbi, this scenario is incredibly common. In fact, mesh network compatibility is the number one reason robot vacuum WiFi setups fail in 2026. The good news is that the fix is almost always straightforward once you understand what is going wrong under the hood.
In this guide, I will walk you through exactly how to fix a robot vacuum that won’t finish WiFi setup on a mesh network. I have spent countless hours troubleshooting this exact problem across multiple vacuum brands and mesh router configurations. The steps below cover everything from quick fixes that take two minutes to advanced mesh router settings that most guides completely skip.
By the end, you will understand why your vacuum keeps failing, how to force the correct network band, and what router settings to change so the connection actually sticks. Let us get your vacuum online.
Table of Contents
Why Robot Vacuums Struggle With Mesh WiFi Networks
Most robot vacuum connectivity issues on mesh networks come down to one fundamental mismatch. Nearly all robot vacuums only support 2.4GHz WiFi, but mesh systems are designed to combine 2.4GHz and 5GHz bands under a single network name (SSID).
This creates a problem during setup. Your vacuum needs to connect to the 2.4GHz band, but your phone (which transfers the WiFi credentials to the vacuum) keeps hopping over to the faster 5GHz band. The vacuum receives credentials for a band it cannot access, and the setup stalls indefinitely.
Mesh networks also introduce complications that traditional single-router setups never had. Features like band steering, client steering, fast roaming, and automatic node handoff are all designed to make your experience smoother. But for smart home devices with basic WiFi chips, these features can actively sabotage the pairing process.
The 2.4GHz Requirement Explained
Robot vacuums use 2.4GHz WiFi because it offers better range and wall penetration than 5GHz. Since a vacuum roams through your entire home, including areas far from the router, manufacturers design around the band that reaches everywhere.
The trade-off is that 2.4GHz is slower and more congested. But for sending cleaning commands, status updates, and map data, the speed difference does not matter. What matters is reliable coverage, and 2.4GHz delivers that.
The problem is that mesh systems often will not tell your vacuum which band to use. They make that decision automatically, and they usually favor 5GHz for devices that support it. Your vacuum does not support it, so it gets left behind.
How Mesh Node Switching Disrupts Setup
On a mesh network, your devices move between nodes (the main router and satellite units) as you move around the house. This is called node handoff or roaming. During normal use, this is seamless. But during the delicate pairing process, a node switch can interrupt the handshake between your phone and the vacuum.
I have seen cases where a vacuum connects successfully, but the moment it rolls away from the dock during a cleaning cycle, it switches nodes and immediately drops offline. The app shows the vacuum as disconnected even though it is still running. This happens because the vacuum’s WiFi chip cannot handle the fast roaming transition between mesh nodes.
This is a problem most troubleshooting guides never mention. Understanding it is half the battle when you are trying to fix a robot vacuum WiFi setup on a mesh network.
Quick Fix Checklist: Try These First
Before diving into advanced troubleshooting, run through this checklist. These quick fixes resolve the majority of mesh-related WiFi setup failures in under five minutes.
- Stand next to the primary mesh node during setup. Distance and node switching are the most common culprits.
- Turn off cellular data on your phone. Some apps conflict when both WiFi and cellular are active during pairing.
- Disable any VPN or private DNS on your phone. These intercept network traffic and can block the vacuum from communicating with the app.
- Check for special characters in your WiFi password. Symbols like @, #, $, or ! can cause setup failures on older vacuum WiFi chips. Try changing your password to letters and numbers only.
- Restart both your phone and the mesh network. Power cycle the main router, wait two minutes, then restart your phone.
- Forget and rejoin your WiFi network on your phone before starting setup. This clears stale network credentials.
- Make sure your vacuum is on the charging dock with solid power lights. Low battery during setup causes unpredictable failures.
If none of these work, do not worry. The detailed steps below cover every scenario, including the mesh-specific settings that trip people up.
How to Fix Robot Vacuum WiFi Setup on a Mesh Network: Step-by-Step
This is the full troubleshooting process. Work through these steps in order, and make only one change at a time. This methodology matters because if you change three settings simultaneously and the vacuum connects, you will never know which fix actually worked. Worse, you might leave unnecessary changes in place that cause problems later.
Step 1: Put Your Robot Vacuum in Pairing Mode
Every robot vacuum has a specific pairing mode that makes it discoverable by the app. Without this mode active, your phone cannot find the vacuum no matter what you do with your router settings.
The exact method varies by brand. For most Roomba models, you press and hold the Home and Spot Clean buttons simultaneously until you hear a tone. For Shark robots, hold the Dock and Clean buttons until the WiFi light blinks. For Roborock, open the top cover and press the WiFi icon button. For Wyze, hold the power button for about five seconds until you hear a voice prompt.
You will know pairing mode is active when the WiFi indicator light is blinking steadily. On most models, this is a slow white pulse. If the light is solid or off, you are not in pairing mode and setup will never proceed.
One common mistake: pairing mode times out after about two minutes on most models. If you spend too long fiddling with your phone settings, the vacuum exits pairing mode silently. Restart the pairing sequence before each setup attempt.
Step 2: Force Your Phone Onto the 2.4GHz Band
This is the single most important step for mesh network setups. Your phone must be connected to 2.4GHz when it transfers WiFi credentials to the vacuum. If your phone is on 5GHz, the credential transfer fails silently.
The challenge is that mesh systems intentionally hide the band selection from you. Both bands share one SSID, and the mesh router decides which one your phone uses. You cannot simply select 2.4GHz from a list.
Here are three proven methods to force 2.4GHz on your phone:
Method A: Walk away from the router. The 5GHz band has much shorter range than 2.4GHz. If you walk far enough from the nearest mesh node (usually 30 to 40 feet through walls), your phone will automatically drop to 2.4GHz. Start the setup process from this location.
Method B: Use a separate 2.4GHz hotspot. Some vacuum apps let you connect the vacuum to a phone hotspot instead of your main WiFi. Create a 2.4GHz hotspot on a second phone, complete the setup, then switch the vacuum to your mesh network afterward.
Method C: Create a dedicated IoT network on your mesh router. Many mesh systems (eero, Google Nest, TP-Link Deco) let you create a separate SSID locked to 2.4GHz specifically for smart home devices. Set this up before starting the vacuum pairing process.
Step 3: Verify App Permissions on Your Phone
App permissions are the silent killer of robot vacuum setups. The vacuum app needs several permissions to function, and if even one is missing or restricted, the setup will fail at the discovery stage.
Here is the complete permissions checklist for both platforms:
On iOS (iPhone):
- Location Services: Must be set to “Always” or at minimum “While Using the App”
- Precise Location: Must be enabled (not approximate)
- Local Network: Must be toggled on for the vacuum app
- Bluetooth: Must be enabled for device discovery
- Cellular Data: Turn OFF during setup to prevent network conflicts
On Android:
- Location: Must be set to “Allow all the time” or “Allow only while using the app”
- Nearby Devices: Must be allowed (Android 12 and later)
- Local Network Access: Must be enabled
- Bluetooth: Must be on for discovery
- WiFi and Bluetooth scanning: Enable both under Location settings
I cannot stress this enough: if your phone denied local network permissions when you first installed the app, the vacuum will never be discovered. This is the most overlooked fix in the entire troubleshooting process. One user on a community forum spent two weeks trying to connect a Wyze vacuum before discovering the iOS Precise Location permission was the blocker.
Step 4: Review Mesh Router Security Settings
Your mesh router’s security configuration can prevent the vacuum from completing setup even when everything else is correct. Here are the specific settings to check.
WPA3 vs WPA2 compatibility: Many newer mesh systems default to WPA3 encryption or a WPA2/WPA3 transition mode. The problem is that most robot vacuums only support WPA2. If your mesh router is set to WPA3-only or WPA2/WPA3 mixed mode, the vacuum’s WiFi chip cannot negotiate the connection. Go into your router settings and temporarily switch to WPA2-PSK (AES) during setup. You can switch back afterward.
MAC address filtering: If you have MAC filtering enabled on your router, only pre-approved devices can join your network. Your vacuum’s MAC address is not on that list yet. Either disable MAC filtering temporarily during setup, or add the vacuum’s MAC address to the approved list. You can usually find the MAC address on a sticker on the bottom of the vacuum or in the manual.
Firewall and device isolation: Some mesh systems have an AP Isolation or Client Isolation feature that prevents devices on the network from communicating with each other. This directly blocks the setup process because your phone needs to talk to the vacuum locally. Disable AP isolation during setup.
DHCP assignment: Make sure your router has DHCP enabled and has available IP addresses in its pool. Some users set up static IP ranges and forget to leave room for new devices. The vacuum needs a dynamically assigned IP address to complete setup.
Step 5: Temporarily Disable Mesh Steering Features
This is where mesh-specific knowledge makes the difference. Mesh routers include several “smart” features that optimize your network for laptops and phones but actively interfere with smart home device pairing. Disabling these temporarily during setup can resolve stubborn connection failures.
Band steering (also called Smart Connect or Band Switching): This feature forces devices onto the “best” band automatically. During vacuum setup, it may try to push the vacuum to 5GHz, which fails. Disable band steering in your mesh app before starting setup.
Client steering (also called Smart Roaming or Airtime Fairness): This feature moves devices between mesh nodes for optimal performance. During the delicate pairing handshake, a sudden node switch can abort the connection. Disable client steering temporarily.
Fast roaming (also called 802.11r or Fast Transition): This feature speeds up the handoff between mesh nodes. Older robot vacuum WiFi chips do not support 802.11r, and the incomplete handshake causes the connection to drop. Turn off fast roaming during the setup process.
Once the vacuum is successfully connected and has completed its initial mapping run, you can re-enable these features one at a time. Test the vacuum’s connectivity after each change to identify which feature, if any, causes problems during normal operation.
Step 6: Set Up a Dedicated 2.4GHz IoT Network
If you want a permanent solution that prevents future connectivity headaches, set up a dedicated IoT (Internet of Things) network on your mesh router. This is a separate SSID locked to 2.4GHz, designed specifically for smart home devices.
Here is how to do it on popular mesh systems:
eero: Open the eero app, go to Settings, then Connected Devices. Some eero models support a separate IoT network through eero Labs. Alternatively, you can create a guest network, which some users dedicate to smart home devices.
Google Nest WiFi: Google Nest does not natively support separate band SSIDs. The workaround is to use a guest network for IoT devices, which runs on 2.4GHz only on most configurations.
Netgear Orbi: Log into the Orbi admin interface, go to Wireless Settings, and disable the “Enable 20/40 MHz coexistence” option. You can also create a separate guest network for IoT devices.
TP-Link Deco: Open the Deco app, tap the WiFi icon, and create an IoT network. TP-Link includes this as a built-in feature on most Deco models. The IoT network is automatically locked to 2.4GHz.
Once the IoT network is active, connect your robot vacuum to this network instead of your main mesh SSID. This eliminates all band confusion permanently.
Step 7: Factory Reset as a Last Resort
If you have tried every step above and the vacuum still will not complete WiFi setup, a factory reset is your last option. This clears all cached network data, removes corrupted firmware states, and returns the vacuum to its out-of-box condition.
The factory reset process varies by brand, but here is how to reset WiFi on robot vacuum models from major manufacturers:
Roomba (iRobot): Open the iRobot Home app, go to Settings, then Remove from account. Then press and hold the Home, Spot Clean, and Clean buttons simultaneously for about 10 seconds until you hear a tone. On newer models like the j7 and s9 series, press and hold the Clean button for 20 seconds.
Shark: Press and hold the Dock and Clean buttons for 10 to 15 seconds until the WiFi light blinks rapidly. The vacuum will restart and enter pairing mode automatically.
Roborock: Open the top cover and locate the reset button (sometimes labeled with a small WiFi icon). Press and hold for 3 to 5 seconds until you hear a voice prompt confirming the reset.
Wyze: Hold the power button for 10 seconds until you hear “factory reset.” Wait for the vacuum to restart, then attempt setup again.
After a factory reset, go back to Step 1 and start the setup process from scratch. This time, the vacuum has no stale network data that could interfere with the connection.
Mesh-Specific Solutions for Persistent Problems
Some robot vacuum WiFi problems go beyond the initial setup. If your vacuum connects but keeps dropping offline, or if it works near the dock but disconnects while cleaning, these mesh-specific solutions address the deeper issues.
Mesh Node Placement Strategy for Robot Vacuums
Where you place your mesh nodes directly affects your vacuum’s connectivity. If your vacuum cleans a large home with nodes spread far apart, it will hit dead zones where no node provides a strong enough 2.4GHz signal.
The dock should be within 10 to 15 feet of a mesh node with minimal walls between them. If the dock sits in a corner far from any node, the vacuum may struggle to maintain a connection even when docked. This causes the app to show the vacuum as offline.
For homes with multiple floors, make sure there is at least one mesh node on each floor where the vacuum operates. The 2.4GHz signal does not penetrate ceilings well, so a vacuum on the ground floor needs a ground-floor node nearby.
Avoid placing mesh nodes behind large metal objects, inside cabinets, or next to appliances that generate interference (microwaves, baby monitors, cordless phones). These all degrade the 2.4GHz signal that your vacuum depends on.
Preventing Node Switching Mid-Clean
If your vacuum connects fine but drops offline while cleaning, node switching is the likely cause. As the vacuum moves through your home, it transitions between mesh nodes. Each transition is a moment where the connection can fail.
The solution is to reduce the number of node transitions the vacuum experiences during a cleaning cycle. Here are practical ways to do this:
First, reduce overlap between mesh nodes. If two nodes have overlapping coverage in the same room, the vacuum may rapidly bounce between them. Move nodes farther apart so each device connects to one clear node at a time.
Second, disable fast roaming (802.11r) permanently if your vacuum has ongoing disconnection issues. Without fast roaming, node transitions take slightly longer but are more reliable for basic WiFi chips.
Third, assign a static IP to the vacuum through your mesh router’s settings. Some mesh systems reassign IP addresses during node transitions, which can confuse the app’s connection. A static IP prevents this.
Finally, check if your mesh system has a “preferred node” or “sticky client” setting. This forces devices to stay connected to their current node until the signal is truly lost, rather than proactively switching. Enabling this for the vacuum reduces unnecessary transitions.
Brand-Specific Mesh Network Tips
Different mesh systems have quirks that affect robot vacuum connectivity differently. Here is what to watch for based on the mesh system you own:
eero: eero’s TrueMesh technology is generally friendly to robot vacuums, but the automatic band steering can interfere during setup. Use the eero app to create a separate network for IoT devices, then connect the vacuum to that network. eero also lets you reserve IP addresses, which helps with persistent disconnection issues.
Google Nest WiFi: Google Nest is the mesh system most frequently cited in robot vacuum connection complaints. The combined SSID with aggressive band steering makes it hard to force 2.4GHz. The most reliable fix is creating a guest network (which runs on 2.4GHz) and connecting the vacuum there.
Netgear Orbi: Orbi uses a dedicated backhaul band that can sometimes cause interference with 2.4GHz devices. If your vacuum keeps disconnecting on Orbi, try changing the 2.4GHz channel in the admin interface. Channels 1, 6, and 11 are the least congested.
TP-Link Deco: Deco has a built-in IoT network feature that makes this entire process much easier. If you have a Deco system, set up the IoT network before you even start the vacuum setup. It saves hours of frustration.
Common Mistakes That Make the Problem Worse
When you are frustrated and just want the vacuum to connect, it is easy to make changes that actually deepen the problem. Based on community forum discussions and support tickets, here are the most common mistakes people make.
Making multiple changes at once. This is the biggest mistake. If you change your WiFi password, disable band steering, and update your router firmware all at the same time, you have no idea which change fixed (or broke) the connection. Always change one variable, test, then move to the next.
Repeatedly retrying failed pairing attempts. Every failed pairing attempt can leave the vacuum in a half-configured state. After three failed attempts, stop and perform a factory reset before trying again. Continuing to hammer the pairing button just piles on corrupted state data.
Ignoring firmware updates. Both your mesh router and your vacuum need current firmware. Router firmware updates frequently fix smart home device compatibility bugs. Vacuum firmware updates improve WiFi stability and fix known connection issues. Check for updates on both before starting a serious troubleshooting session.
Using special characters in your WiFi password. Many robot vacuums use basic WiFi chips that do not properly parse special characters like @, #, $, %, or ! in passwords. If your password contains symbols, change it to letters and numbers only during setup. You can always change it back once the vacuum is connected.
Forgetting to check phone-level network settings. Private DNS, VPN apps, ad blockers that run at the network level, and custom DNS servers can all interfere with the local communication between your phone and the vacuum during setup. Disable all of these before pairing.
Status Light Reference Guide
Your robot vacuum’s WiFi indicator light tells you exactly what state the device is in. Misreading the light pattern leads to wasted time and failed setups. Here is a quick reference for common status light meanings:
Slow blinking white: The vacuum is in pairing mode and ready for setup. This is the state you want.
Fast blinking white: The vacuum is attempting to connect to WiFi. Do not touch anything during this phase.
Solid white: WiFi is connected successfully. The vacuum is online and ready to use.
Blinking amber or red: There is a WiFi error. The vacuum failed to connect or lost its connection. Start troubleshooting.
No light: The vacuum is not in pairing mode, or the battery is too low for setup. Charge the vacuum and restart the pairing sequence.
Note that exact light patterns vary by manufacturer. Always cross-reference with your vacuum’s manual, but these general patterns apply to most brands.
FAQs
What is a potential solution if the robot vacuum cannot complete Wi-Fi configuration?
The most effective solution is to force your phone onto the 2.4GHz band before starting setup. Walk 30 to 40 feet away from your nearest mesh node to trigger a band drop, verify app permissions (location, local network, Bluetooth) are all enabled, disable any VPN or private DNS, then retry the pairing process. If this fails, create a dedicated 2.4GHz IoT network on your mesh router and connect the vacuum to that SSID instead.
Why is my robot vacuum not connecting to Wi-Fi?
The most common reasons are band incompatibility (the vacuum only supports 2.4GHz but your phone is on 5GHz during credential transfer), missing app permissions (especially local network and precise location access on iOS), WPA3 encryption incompatibility with the vacuum’s WiFi chip, or special characters in your WiFi password that the vacuum cannot parse. Mesh network band steering and client steering features can also block the pairing handshake.
How to reset Wi-Fi on robot vacuum?
To reset WiFi on a robot vacuum, press and hold the designated reset button combination for your brand. For Roomba, hold the Home, Spot Clean, and Clean buttons for 10 seconds. For Shark, hold Dock and Clean for 10 to 15 seconds. For Roborock, press the WiFi icon button inside the top cover for 3 to 5 seconds. For Wyze, hold the power button for 10 seconds. The vacuum will restart and enter pairing mode automatically after the reset completes.
Can my robot vacuum work without Wi-Fi?
Yes, most robot vacuums can clean without WiFi. You can start cleaning cycles by pressing the physical Clean button on the vacuum. However, without WiFi you lose access to app control, remote scheduling, mapping features, cleaning history, no-go zone settings, and firmware updates. The vacuum will clean but operates in a basic mode with limited functionality.
How do I force my phone to use 2.4GHz during robot vacuum setup?
Since mesh networks combine both bands under one SSID, you cannot directly select 2.4GHz. Instead, walk 30 to 40 feet away from the nearest mesh node so your phone automatically drops to the longer-range 2.4GHz band. Alternatively, create a dedicated 2.4GHz IoT network or guest network on your mesh router, connect your phone to it, then run the vacuum setup. You can also use a second phone as a 2.4GHz hotspot if the vacuum app supports hotspot pairing.
Wrapping Up: Get Your Vacuum Online for Good
Fixing a robot vacuum WiFi setup on a mesh network comes down to understanding the 2.4GHz limitation, forcing the correct band during setup, verifying app permissions, and adjusting mesh router settings that interfere with smart home devices.
The one-change-at-a-time methodology is your best friend here. Change one thing, test the result, then move to the next fix. And if you want a permanent solution that prevents future headaches, set up a dedicated 2.4GHz IoT network on your mesh router before you even unbox your next smart device.
Start with the quick fix checklist, work through the step-by-step process, and your vacuum will be online and mapping your home before you know it.