
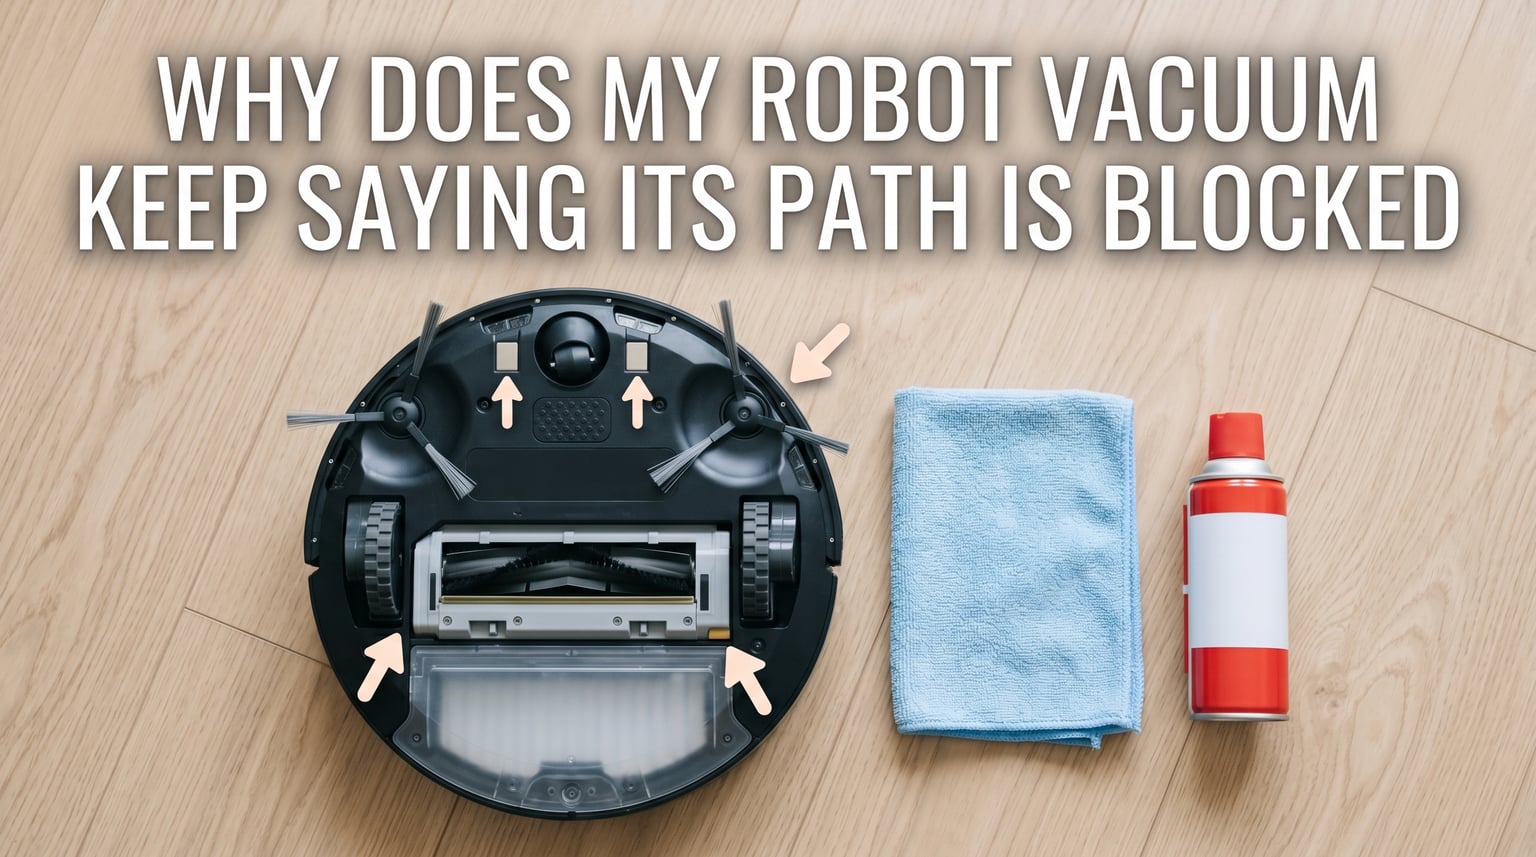
Your robot vacuum sits in the middle of an empty room and refuses to move. It keeps flashing “path blocked” even though there is nothing in front of it. You have checked twice, moved chairs, picked up cables, and the error will not go away.
This is one of the most frustrating issues robot vacuum owners face. I have seen it happen with Roomba, Roborock, Ecovacs, and Shark models alike. The good news is that the problem is almost always fixable at home without any replacement parts.
Your robot vacuum keeps saying its path is blocked because its sensors are sending false signals to the processor. Dust, debris, dark surfaces, or corrupted maps confuse the navigation system into thinking an obstacle exists where there is none. Cleaning the sensors, deleting the saved map, or performing a factory reset resolves the issue in most cases.
In this guide, I will walk you through exactly why this happens, which sensors are responsible, and how to fix the error step by step. I have pulled solutions from iRobot support documentation, appliance repair experts on JustAnswer, and real user reports on Reddit to give you a complete picture of the robot vacuum path blocked error.
Table of Contents
Quick Answer: Why Your Robot Vacuum Thinks the Path Is Blocked
A robot vacuum path blocked error occurs when the navigation sensors misread the environment. The robot cannot tell the difference between a real obstacle and a false reading, so it stops and reports a blocked path to protect itself from damage.
The most common causes of this error are:
- Dirty or dusty cliff sensors that falsely detect a drop
- A smudged LiDAR turret dome or camera lens that cannot map the room
- A stuck or partially compressed bumper sensor that thinks it is touching something
- Dark carpets or dark hardwood floors that absorb infrared signals
- Mirrors, glass doors, or reflective surfaces bouncing navigation signals back
- A corrupted or outdated map that no longer matches your home layout
- Outdated firmware causing navigation glitches and false obstacle detection
- Low light conditions confusing camera-based navigation systems
Nine times out of ten, a thorough sensor cleaning fixes the problem within 10 minutes. If that does not work, deleting the saved map and letting the robot create a fresh one is the next step. A factory reset is your last resort before contacting manufacturer support.
Why Robot Vacuums Falsely Detect Blocked Paths
To understand the robot vacuum path blocked error, you need to know how these machines see the world around them. Your robot does not have eyes like ours. It relies on a combination of infrared sensors, optical cameras, laser turrets, and physical bumpers to navigate your home.
Each sensor has a specific job. Cliff sensors point downward to detect stairs and ledges. LiDAR turrets spin on top of the robot to map walls and furniture in 360 degrees. Bumper sensors detect physical contact with objects. Cameras track visual landmarks on ceilings and walls for positioning.
When one of these sensors gets dirty or confused, it sends incorrect data to the processor. The robot’s software treats every sensor reading as real because it has no independent way to verify. So when a dusty cliff sensor reports a drop that does not exist, the robot stops dead and says the path is blocked.
This is why the error feels so unpredictable. The robot works perfectly on Monday, then refuses to leave the kitchen on Tuesday. Something changed in the sensor readings between those two runs, and it usually comes down to dust accumulation, a moved piece of furniture, or a lighting change.
One Reddit user described the frustration perfectly in a thread that got hundreds of upvotes: “I did a factory reset and it worked for one run.” That temporary fix points to a software or map corruption issue rather than a hardware failure. The reset cleared the corrupted data temporarily, but the underlying cause returned on the next cleaning cycle.
Multiple Roomba J9 users report the exact same daily blocking behavior at the same spot in their home. This pattern strongly suggests a mapping error or environmental trigger at that specific location rather than a random sensor glitch.
The key takeaway is this: your robot is not broken. It is responding to bad data from its sensors. Fix the data, and the robot works normally again.
Common Sensor Types and How They Fail
Different sensors fail in different ways. Knowing which sensor is responsible for your specific error helps you fix it faster and avoid wasting time on the wrong solution.
Cliff Sensors
Cliff sensors are small infrared detectors located on the underside of the robot. They point downward and measure the distance to the floor by bouncing infrared light off the surface. If the signal bounces back quickly, the robot knows it is on solid ground. If the signal takes longer or never returns, the robot assumes it is at the edge of stairs and stops immediately.
The problem is that dust, pet hair, and fine debris accumulate on these sensor windows over time. A thin layer of grime partially blocks the infrared beam, and the sensor reports a false cliff reading. The robot then refuses to move forward, displaying a path blocked or cliff sensor error message.
Most robot vacuums have four cliff sensors spaced along the front and sides of the underside. All four need to be clean for reliable navigation. Even one dirty sensor can trigger false readings that stop the entire robot.
Dark surfaces cause a similar issue from a different mechanism. Black carpets, dark hardwood, and patterned rugs absorb infrared light instead of reflecting it back to the sensor. The sensor interprets this missing return signal as a cliff even though the floor is completely solid. iRobot’s own support documentation confirms this behavior and suggests moving the robot to a lighter area.
LiDAR Turret
The spinning laser turret on top of newer robot vacuums creates a precise 360-degree map of the room. It fires thousands of laser pulses per second and measures how long each one takes to bounce back from walls, furniture, and doorframes. This technology is called LiDAR, and it is remarkably accurate when the components are clean.
However, the clear plastic dome covering the turret gets smudged with fingerprints, dust, and kitchen grease over time. When the laser beam passes through a dirty dome, the readings become unreliable. The robot may think a wall is closer than it actually is, or it may fail to detect an open doorway between rooms.
A LiDAR blocked error means the turret itself cannot spin freely or the dome is too dirty for accurate readings. This directly triggers path blocked messages because the robot loses its map reference and cannot determine where it is in your home.
In rare cases, the LiDAR motor itself fails. If you hear grinding or clicking sounds from the turret area, the motor may be worn out. This requires manufacturer service rather than home repair.
Camera-Based Navigation
Some robot vacuums use cameras instead of laser turrets. Roomba models with vSLAM technology take photos of the ceiling and walls to track their position using visual landmarks. Ecovacs and Roborock also use camera-based navigation on certain models in their product lines.
Cameras struggle significantly in low light conditions. If your robot runs at night or in a dimly lit hallway, the camera cannot identify landmarks and may report a navigation error instead of cleaning. Many users schedule cleaning runs during the day to avoid this problem entirely.
Smudges on the camera lens create the same issue as a dirty LiDAR dome. A fingerprint on the lens blurs the image, and the navigation algorithm cannot match landmarks to its stored map. The result is a confused robot that reports a blocked path.
Bumper Sensor
The spring-loaded bumper on the front of the robot detects physical contact with objects. When the robot hits a wall or piece of furniture, the bumper compresses inward and triggers a microswitch. The robot then knows to stop, turn, and find a new path around the obstacle.
The bumper can get stuck in a partially compressed position. Dirt, pet hair, or even a small pebble lodged in the gap between the bumper and the robot body keeps the switch pressed. The robot thinks it is constantly touching something and reports the path as blocked everywhere it goes.
This issue is easy to diagnose. If the bumper does not spring back when you press it with your finger, something is jammed in the gap. Running a thin piece of paper or a clean toothbrush bristle around the entire bumper gap usually dislodges the debris.
Infrared Wall Sensors
Some robots also use infrared sensors along the sides to detect walls and maintain a consistent cleaning distance. These side sensors can get dusty just like cliff sensors, causing the robot to veer or stop unexpectedly along walls.
Dark Floors, Carpets, and Reflective Surfaces
Environmental factors are a major cause of false path blocked errors that catch many owners by surprise. Your home’s floor materials and layout directly affect how the robot’s sensors behave during cleaning cycles.
Dark surfaces are the single most common environmental trigger. Black carpet, dark hardwood, charcoal-colored rugs, and deep-toned floor tiles all absorb infrared light from cliff sensors. The sensor never receives a return signal and interprets the absence as a cliff edge. The robot stops dead and displays a path blocked or cliff sensor warning.
This is a well-documented issue confirmed by iRobot’s official support article, which states that Roomba may report being stuck on a dark surface, over an edge, or on a threshold. The recommended fix is to move the robot to a different location and press CLEAN to restart the cycle.
Multiple Roomba J9 and J7 users on Reddit report their robots getting stuck daily at the exact same dark rug transition. The solution in these cases is to either replace the dark rug with a lighter color or add a no-go zone in the app around the problematic area.
Mirrors and glass doors create the opposite problem. LiDAR and camera-based systems bounce signals off reflective surfaces, making the robot think there is open space where a mirror or glass partition stands. The robot may try to drive through a glass door or get confused about room boundaries and report a navigation failure.
Highly polished floors can also reflect infrared signals in unexpected directions. The sensor receives a delayed return signal and miscalculates the distance to the floor surface. This can cause erratic behavior on glossy tile or polished concrete.
If your robot gets stuck at the same spot every single time, stop and look at what is on the floor and walls in that area. A dark rug, a floor-to-ceiling mirror, a glass coffee table, or even a shiny metal threshold strip could be triggering false sensor readings.
Thresholds between rooms are another common trouble spot. A raised threshold between hardwood and tile can confuse both cliff sensors and wheel encoders. If the threshold is dark or reflective, the problem compounds. Placing a small ramp or adding a no-go zone often resolves this.
Mapping and Software Issues
Not all path blocked errors come from dirty sensors or dark floors. The robot’s software and its saved map of your home can also trigger the same error message through a completely different mechanism.
Robot vacuums create a map of your home during their first few cleaning runs. They use this map to navigate efficiently on subsequent cycles, choosing the shortest path between rooms and tracking which areas have already been cleaned. If this map gets corrupted or becomes outdated, the robot may think a wall exists where there is actually a doorway.
Map corruption happens when furniture is moved, doors are closed that were previously open during mapping, or new large objects are added to a room. The robot’s internal map no longer matches the physical reality of your home, and navigation starts failing in specific areas.
The signature sign of a map issue is when the robot works fine in some rooms but completely refuses to enter others. It may spin in circles at a doorway or report the path as blocked when transitioning between mapped zones. It may also fail to find its charging dock even though the path appears perfectly clear.
Firmware bugs can also cause false path blocked errors. Manufacturers release software updates regularly to fix known navigation issues and improve obstacle detection algorithms. If you have not updated your robot’s firmware in several months, a pending update could resolve your problem with no physical cleaning required.
Wi-Fi connectivity issues can compound mapping problems. If the robot loses its connection mid-clean, it may fail to download map updates or sync its position data. This can cause the robot to behave erratically and report false obstacles. Check your Wi-Fi signal strength near the charging dock and in areas where the robot tends to get stuck.
Brand-Specific Error Messages
Different brands use different wording for the same underlying sensor problem. Knowing what your specific manufacturer’s error message means saves you time during troubleshooting.
Roomba Error Codes (iRobot)
iRobot Roomba displays specific numbered error codes. “Please inspect and clean Roomba’s cliff sensors” means the cliff sensors are either dirty or the robot is sitting on a surface that absorbs infrared light. Moving the robot to a lighter floor area and pressing CLEAN usually clears this immediately.
Error 6 indicates a stuck bumper sensor. The robot senses that the bumper is compressed and cannot release back to its resting position. Cleaning the bumper gap with compressed air or a thin brush typically resolves this within seconds.
The “navigation sensor blocked” message on newer Roomba models like the J7 and J9 points to the front-facing obstacle detection sensor located behind a small window. Dust accumulation on this sensor window is the usual cause. Wipe it clean with a dry microfiber cloth.
Roomba models with Clean Base stations may also show dock-related errors that cascade into path blocked messages. If the robot cannot find its dock due to a cluttered base area, it may report navigation errors elsewhere in the home.
Roborock Errors
Roborock models show a “LiDAR blocked” or “laser sensor error” when the turret dome is dirty or the turret mechanism is obstructed. The robot may also display “obstacle ahead” repeatedly in an empty space if the LiDAR readings are corrupted by a smudged dome.
Roborock robots are generally more sensitive to LiDAR dome cleanliness than other brands because they rely heavily on laser mapping. Clean the dome weekly if you have a Roborock model.
Ecovacs Deebot Errors
Ecovacs Deebot models show a red indicator light and announce “path blocked” when navigation sensors fail. A persistent red light after thorough sensor cleaning suggests a map corruption issue that requires deleting the saved map and running a fresh exploration cycle.
Older Deebot models without LiDAR rely more heavily on bumper sensors and random bounce navigation. These models are more prone to bumper-related false readings.
Shark IQ and AI Errors
Shark IQ and Shark AI models sometimes report an obstacle after completing one circle in a room, even when the space is completely empty. This behavior typically indicates a bumper sensor sensitivity issue or a cliff sensor false positive rather than an actual obstruction.
Shark models also occasionally lose their map after power outages. If the robot starts behaving erratically after a power event, deleting and recreating the map is the fix.
Step-by-Step Troubleshooting Guide
Follow these steps in order. Start with sensor cleaning, which fixes roughly 70 percent of path blocked cases. Move to map deletion if cleaning does not resolve the issue. Try a factory reset only as a last resort before contacting manufacturer support.
How to Clean Robot Vacuum Sensors
Step 1: Turn off the robot vacuum completely and place it on a flat, well-lit surface. A kitchen table or counter works well.
Step 2: Flip the robot over so the underside faces up. You should see the cliff sensors, caster wheel, brush rollers, and side brush.
Step 3: Locate the cliff sensors. These are small rectangular glass or plastic openings along the front edge and sides of the underside. Most robots have four cliff sensors spaced evenly apart.
Step 4: Use a clean, dry microfiber cloth to wipe each sensor opening gently. Blow into the openings to dislodge embedded dust. You can also use compressed air held at least six inches away from the sensor.
Step 5: Find the bumper gap that runs around the entire front edge of the robot. Run a thin piece of paper, a business card, or a clean toothbrush along the full circumference of the gap to remove trapped hair and debris.
Step 6: For LiDAR models, gently wipe the clear plastic dome on top of the robot with a dry microfiber cloth. Do not press hard, as the dome is delicate and scratches easily. A scratched dome scatters the laser beam and causes ongoing navigation issues.
Step 7: For camera-based models like Roomba J series, clean the small camera lens on the front of the robot with a dry microfiber cloth. Avoid touching the lens directly with your fingers, as skin oils cause smudges that are hard to see but affect image quality.
Step 8: Spin the front caster wheel with your fingers and clean around its housing. A tangled or jammed caster wheel sends incorrect movement data to the processor and can trigger navigation errors. Remove the wheel if your model allows it and clear any wrapped hair.
Step 9: Check the charging contacts on both the robot underside and the dock base. Dirty contacts can cause power inconsistencies that lead to erratic behavior during cleaning cycles.
Step 10: Turn the robot back on, place it in the problem area, and run a cleaning cycle to test whether the error has cleared.
Factory Reset Procedure by Brand
A factory reset erases the saved map, Wi-Fi credentials, and cleaning schedules. It restores the robot to its out-of-the-box state. Use this only when sensor cleaning and map deletion have not resolved the path blocked error.
Roomba reset: Open the iRobot Home app, select your robot, go to Settings, and choose Factory Reset. Alternatively, hold the HOME and SPOT CLEAN buttons simultaneously for 10 seconds until the robot plays a confirmation tone.
Roborock reset: Open the Roborock app, go to Settings, and select Restore Factory Settings. The robot will delete its map, disconnect from Wi-Fi, and restart.
Ecovacs Deebot reset: Open the Ecovacs app, select your robot, go to Settings, and choose Restore Factory Settings. Older Deebot models without app connectivity can be reset by pressing and holding the AUTO button for 10 seconds until you hear a tone.
Shark reset: Open the SharkClean app, go to robot settings, and select Reset Robot. On the physical robot, hold the Dock and Clean buttons simultaneously for 5 seconds until the indicator light flashes.
After any factory reset, you will need to reconnect the robot to Wi-Fi, run a new mapping cycle, and set up cleaning schedules from scratch. Plan for one or two training runs where the robot slowly explores your home and builds a new map.
Map Deletion and Remapping
If you prefer not to do a full factory reset, try deleting just the saved map. This preserves your Wi-Fi settings and cleaning schedules while forcing the robot to create a fresh map from scratch.
In the Roomba app: Go to Map Options, select your current map, and choose Delete Map. Then run a dedicated Mapping Run from the app menu.
In the Roborock app: Open the map editor, select the option to create a new map, and the old map will be archived automatically.
In the Ecovacs app: Select your current map from the map list and choose Delete. The robot will prompt you to run an exploration clean to build a new one.
In the SharkClean app: Go to Map Settings and select Delete Map. Run a cleaning cycle and the robot will rebuild the map during the run.
After deleting the map, make sure all interior doors are open and the floor is clear of obstacles. The robot needs an accurate, unobstructed exploration of your home to build a reliable replacement map. Close doors to rooms you do not want included in the cleaning area.
Prevention Tips and Maintenance Schedule
Regular maintenance prevents most path blocked errors from recurring. A few minutes of cleaning each week keeps your robot’s sensors working at full accuracy and extends the life of the device.
Weekly maintenance: Wipe all four cliff sensors with a dry microfiber cloth. Check the bumper gap for trapped hair and remove it with a toothbrush. Empty the dustbin after every cleaning cycle, not just when it looks full.
Monthly maintenance: Clean the LiDAR dome or camera lens with a soft, dry cloth. Inspect the front caster wheel for tangled hair and remove the buildup. Check for firmware updates in the app and install them promptly.
Quarterly maintenance: Remove and deep clean the main brush roller and side brush. Replace the HEPA filter if it appears worn or discolored. Run a diagnostic cycle if your manufacturer’s app offers one.
If you have dark carpets or dark floor areas, add a no-go zone in your app around those specific spots. This prevents the robot from attempting to cross surfaces that confuse its cliff sensors, eliminating that source of false errors entirely.
For mirrors and glass doors, place virtual walls or no-go lines in the app to keep the robot away from reflective surfaces. This is especially important for floor-length mirrors and glass shower enclosures that extend to the floor.
Keep the charging dock area clear for at least three feet on all sides. A cluttered dock area causes mapping confusion and docking failures that can cascade into path blocked errors throughout the home. The dock should sit on a hard surface, not carpet, for best results.
Avoid running camera-based robots in complete darkness. If you schedule cleaning runs for nighttime, leave a small nightlight on in each room the robot needs to navigate. This gives the camera enough light to identify landmarks and maintain its position.
When to Contact Manufacturer Support
If you have cleaned every sensor thoroughly, deleted the map, performed a factory reset, updated the firmware to the latest version, and the path blocked error still persists, you may have a genuine hardware failure.
A failing cliff sensor, a worn-out LiDAR motor, a damaged bumper microswitch, or a faulty camera module cannot be fixed at home. These components require professional repair or replacement through the manufacturer’s service program.
Contact the manufacturer’s support team and describe every troubleshooting step you have already completed. This saves time because the support representative will skip the basic steps and move directly to advanced diagnostics or warranty service.
Most robot vacuum warranties cover sensor failures for one to two years from the purchase date. Have your receipt, model number, and serial number ready when you call. If your robot is out of warranty, some manufacturers offer discounted repair programs or certified refurbished replacements.
FAQs
Why does my Roomba keep saying the navigation sensor is blocked?
Your Roomba reports a blocked navigation sensor when dust or smudges cover the front-facing obstacle detection lens behind the small sensor window. Wipe the sensor window with a dry microfiber cloth. If the error persists, the robot may be on a dark surface confusing its cliff sensors, or the saved map may be corrupted and need deletion.
How do I reset a robotic vacuum cleaner?
Open the manufacturer app and find the factory reset option in settings. For Roomba, hold the HOME and SPOT CLEAN buttons for 10 seconds until you hear a tone. For Roborock and Ecovacs, use the app settings menu. A reset erases your map and Wi-Fi settings, so you will need to reconnect and remap afterward.
How do I clean robot vacuum cliff sensors?
Turn off the robot and flip it over. Locate the four small glass or plastic openings along the front edge of the underside. Wipe each one with a dry microfiber cloth and blow out embedded dust with compressed air held six inches away. Avoid using liquids, which can damage the infrared components inside.
Why does my robot vacuum keep stopping in the middle of cleaning?
Random stops usually come from dirty sensors, a full dustbin, low battery, or tangled brush rollers. Clean all sensors, empty the bin, clear hair from the brushes, and charge the robot fully before the next run. If it still stops, check for a firmware update in the app that may fix known navigation bugs.
Can dark carpets cause a path blocked error?
Yes, dark carpets are a leading cause of false path blocked errors. Black and dark-colored carpets absorb the infrared signal from cliff sensors, making the robot think it is at the edge of stairs. The robot stops and reports a blocked or cliff error. Add a no-go zone in your app around dark carpets to prevent this.
Why does my robot vacuum work one day but not the next?
This pattern points to a map corruption or firmware issue rather than a hardware fault. The robot’s saved map no longer matches your home layout, possibly due to moved furniture or closed doors. Delete the map in the app and run a fresh mapping cycle. If that fails, perform a factory reset.
Conclusion
The robot vacuum path blocked error is almost always a sensor or software issue, not a real physical obstacle in your home. Dirty cliff sensors, smudged LiDAR domes, dark carpets, reflective surfaces, and corrupted maps account for the vast majority of cases across all major brands.
Start by cleaning every sensor thoroughly using the 10-step process above. If the error persists, delete the saved map and let the robot create a fresh one. A factory reset is your final option before reaching out to manufacturer support for a possible hardware warranty claim.
Most owners resolve this error within 15 minutes using nothing more than a microfiber cloth and compressed air. With a regular weekly maintenance routine, you can prevent it from coming back and keep your robot vacuum cleaning reliably all year long.