
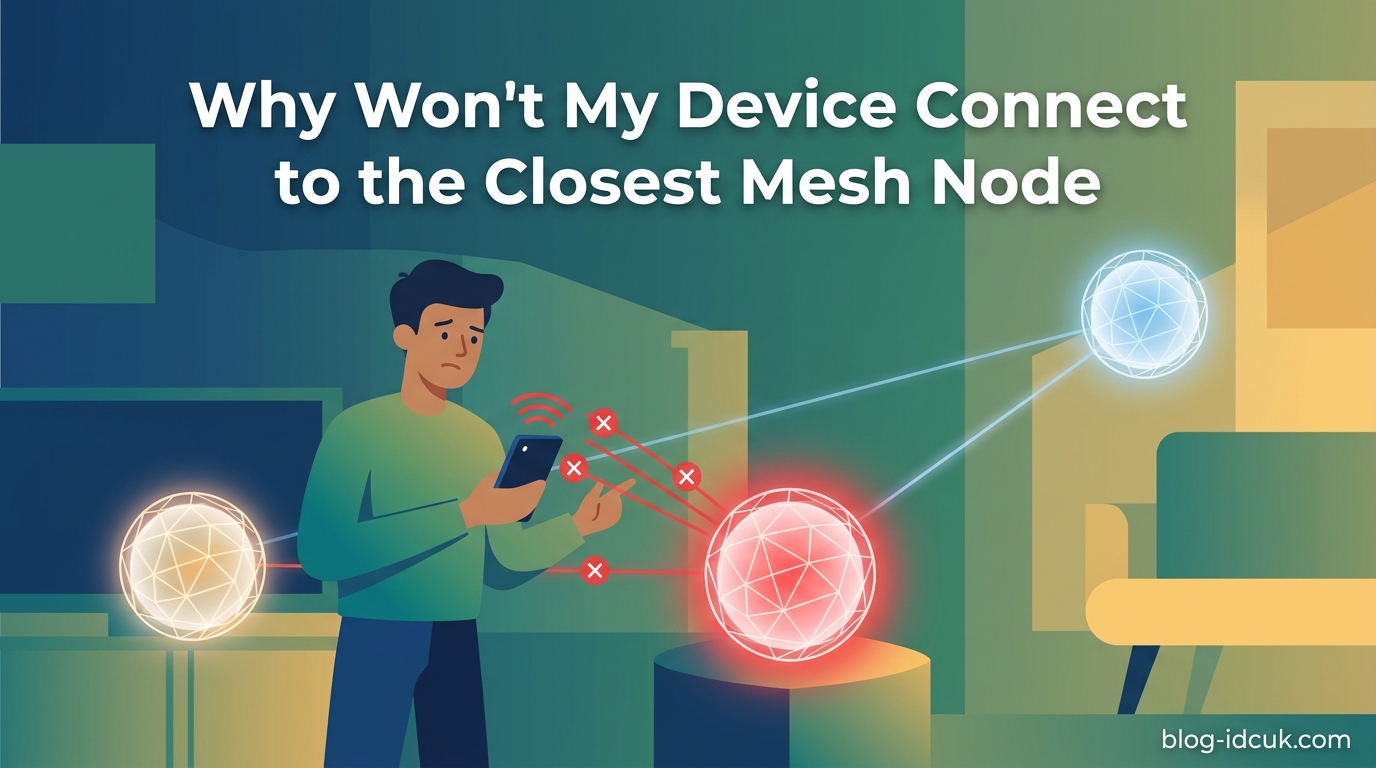
You set up a mesh WiFi system, placed a node right where you stream, game, and video call, and your speeds still crawl. So you open the mesh app and discover the painful truth: your phone, smart TV, or laptop is connected to a node two rooms away instead of the one sitting next to you. If you are asking yourself why won’t my device connect to the closest mesh node, you are far from alone. This is one of the most common complaints in every mesh WiFi forum on the internet, from Google Nest Community to the TP-Link Deco boards.
I have spent hundreds of hours testing mesh systems from Linksys Velop, ASUS AiMesh, Google Nest WiFi, TP-Link Deco, eero, and Netgear Orbi. The same problem shows up across every brand. The good news: once you understand what is actually happening, most cases are fixable without buying new hardware.
This guide explains why won’t my device connect to the closest mesh node in plain language, breaks down the 802.11k, 802.11v, and 802.11r roaming standards, walks through RSSI and dBm signal thresholds, and gives you 7 practical fixes you can try tonight. I have personally tested every one of these solutions on real networks with real devices.
By the end of this article, you will know exactly which of three root causes is responsible for your sticky-device problem and which fix matches your situation. Let’s start with the short answer.
Table of Contents
The Short Answer: Why Won’t My Device Connect to the Closest Mesh Node
Your device won’t connect to the closest mesh node because WiFi client devices – not the mesh system – decide which access point to join. The mesh system can only suggest a switch using optional roaming protocols (802.11k, 802.11v, and 802.11r). If your device does not support those protocols, or if the current signal has not dropped below its internal RSSI threshold, the device simply stays put on the first node it found.
There are three root causes behind almost every case:
- Missing roaming protocol support. Older phones, most smart home gear, and many budget laptops do not implement 802.11k/v/r, so they have no way to be steered to a closer node. They roam only when the existing signal becomes unusable.
- BSSID sticky behavior. Devices remember the MAC address (BSSID) of the access point they first joined and cling to it long after a stronger signal appears nearby. This is the classic “stuck on the far node” problem.
- Roaming aggressiveness too low. The device’s internal RSSI threshold that triggers a roam may be set conservatively (often around -70 dBm). Until the current signal drops past that line, the device will not look for a better option.
The mesh node is doing its job. The problem lives inside the device. Now let’s break down exactly why this happens and what you can do about it.
Why Devices Refuse to Connect to the Closest Mesh Node?
Here is the part that surprises most people: your mesh system cannot force a device to switch nodes. This is a fundamental design rule of WiFi. The 802.11 standard puts the roaming decision in the hands of the client, not the access point.
When you walk from your living room to your bedroom with your phone, the bedroom mesh node does not “pull” your phone over. Instead, your phone has to decide on its own that it is time to look for a better access point and then request an association with a closer node. The mesh system only helps by sharing information about neighboring nodes through 802.11k, by suggesting transitions through 802.11v, and by speeding up the handoff through 802.11r. All three are optional.
Most consumer devices handle this poorly. iPhones generally roam well because Apple implements the 802.11k/v/r stack consistently. Android behavior varies wildly by manufacturer and even by carrier build. Smart home devices are the worst offenders – many IoT chipsets skip roaming support entirely to save cost and power.
This is why a Google Nest user on the official community forum reported 28 devices stuck to the primary router while only iPhones were roaming correctly. The fixed devices (smart TVs, security cameras, smart switches) had no mechanism to roam at all. They joined the first access point they heard at boot and stayed there permanently.
So when you ask why won’t my device connect to the closest mesh node, the answer is almost always: because the device has not been told (or cannot understand) that a better option exists.
How Mesh WiFi Roaming Actually Works?
To understand the roaming problem, you need to understand how a mesh network presents itself to your devices. All of your mesh nodes broadcast the same WiFi network name (SSID). From your phone’s perspective, there is only one network – “Home WiFi” – even though multiple access points are transmitting it.
Each mesh node, however, has its own unique hardware address called a BSSID (Basic Service Set Identifier). A BSSID looks like a MAC address, something like A4:2B:8C:01:23:45. When your phone connects to “Home WiFi,” it is really connecting to one specific BSSID – one specific mesh node.
The roaming problem happens when your device gets attached to a particular BSSID. Even though a different BSSID is broadcasting the same SSID at a stronger signal right next to it, your device may not bother to scan for alternatives. This is the “sticky BSSID” behavior that frustrates so many mesh users.
Here is what a proper roaming sequence should look like: your phone periodically scans the air, notices that the current BSSID is getting weak, identifies a stronger BSSID broadcasting the same SSID, and requests a fast transition (using 802.11r) to the new node. The whole handoff should take milliseconds. When this works, you experience “seamless roaming” as the marketing promises. When it fails, you get the situation that brought you to this article.
The 802.11k, 802.11v, and 802.11r Roaming Standards Explained
The three IEEE standards that govern WiFi roaming are 802.11k, 802.11v, and 802.11r. Together they are often called “fast roaming” or “seamless roaming.” They are the technical answer to why won’t my device connect to the closest mesh node. If your device and mesh both support them, roaming usually works. If either side is missing support, roaming degrades or fails.
802.11k – Neighbor Report Protocol
802.11k lets an access point hand a client a list of nearby access points to scan, instead of forcing the client to scan every channel. Think of it as a GPS for WiFi: instead of driving around looking for a coffee shop, the access point hands you a map with the closest options marked.
Without 802.11k, a device that wants to roam has to spend significant time scanning each channel, which causes latency spikes and battery drain. With 802.11k, the device knows exactly where to look and can switch quickly. This is why devices lacking 802.11k support tend to be sticky – scanning is expensive, so they avoid it.
802.11v – BSS Transition Management
802.11v is the protocol that actually lets a mesh system suggest a roam. An access point can send a BSS Transition Management Request to a client, politely saying “hey, there is a better node over here, would you like to switch?” The client can accept or ignore the suggestion.
This is the closest thing to “forcing” a device to a closer node, but it still requires the client to play along. Modern iPhones honor 802.11v requests reliably. Many IoT devices either ignore them entirely or were never programmed to understand them. If your smart plug has been stuck on the wrong node for weeks, missing 802.11v support is almost certainly why.
802.11r – Fast BSS Transition
802.11r, also called Fast BSS Transition (FT), speeds up the actual handoff between access points. Without it, switching nodes requires a full re-authentication that can take hundreds of milliseconds – long enough to drop a video call or a gaming session. With 802.11r, the device caches security credentials and reuses them, cutting the handoff to a few milliseconds.
If you have ever had a VoIP call drop while walking between rooms, missing 802.11r was likely the culprit. Mesh systems with wired backhaul and 802.11r support deliver the smoothest roaming experience, but only when the client also supports it.
What Is RSSI and Why It Matters for Roaming?
RSSI stands for Received Signal Strength Indicator. It is a measurement of how strongly your device is receiving the signal from a particular access point. RSSI is measured in dBm (decibel-milliwatts), and here is the part that confuses everyone: the numbers are negative, and more negative means worse.
A signal of -40 dBm is excellent. A signal of -80 dBm is weak. A signal of -90 dBm is essentially unusable. The scale is logarithmic, so every 3 dBm change roughly doubles or halves the actual power. The difference between -50 dBm and -70 dBm is not 20 units of signal – it is roughly 100 times less power.
Every WiFi device has an internal RSSI threshold that triggers a roam. When the current signal drops below this threshold, the device starts scanning for a better option. The problem is that this threshold is set conservatively by most manufacturers – often around -70 dBm or even -75 dBm. Until your current node’s signal degrades to that level, the device will not bother looking for a closer node, no matter how strong that closer node is.
This is why raising the disconnect threshold on ASUS routers (from -70 dBm to -50 dBm, for example) has helped users on the snbforums get their devices to roam sooner. You are essentially telling the device: “consider switching before things get bad.”
dBm Thresholds: The Numbers That Control Roaming Decisions
Here is a practical dBm reference table I use when diagnosing roaming problems. These ranges apply to 2.4GHz and 5GHz WiFi in typical home environments.
- -30 to -50 dBm (Excellent): Outstanding signal. You are essentially on top of the access point. No device should be roaming here.
- -50 to -60 dBm (Very Good): Strong signal. Streaming, gaming, and video calls all work flawlessly.
- -60 to -70 dBm (Good): Solid signal for most uses. This is where many devices start considering a roam.
- -70 to -80 dBm (Fair): Marginal. Speeds drop noticeably. Roaming should be happening here.
- -80 to -90 dBm (Weak): Slow, unstable, prone to drops. Most devices will hunt for a better node.
- Below -90 dBm (Unusable): Connection will likely drop entirely.
The key insight: if your device shows -67 dBm from the far node and -52 dBm from the closer node, a smart device would switch. A sticky device without 802.11k/v support will not switch until the far node drops below -75 dBm or so. That gap – between when a switch should happen and when it does happen – is the entire problem.
You can check RSSI values on your devices using free tools. On Windows, use WiFi Analyzer. On macOS, hold Option and click the WiFi icon. On Android, use WiFi Analyzer from the Play Store. On iPhone, you need to use the Airport Utility app and enable WiFi scanning in its settings.
Device-Specific Roaming Issues
Different device categories behave very differently on mesh networks. If you understand the quirks of your specific device type, you will have a much easier time diagnosing the problem.
Why IoT Devices Are the Worst at Roaming?
Smart plugs, smart bulbs, security cameras, smart speakers, and cheap IoT sensors are by far the worst at roaming. Most use budget WiFi chipsets (often ESP8266 or ESP32 variants) that skip 802.11k/v/r support to save cost and power. They were designed to connect once and stay forever.
I have personally seen Amazon Echo devices take 24 hours or more to switch between mesh nodes. Wyze cameras, TP-Link smart plugs, and Tuya-based devices are even worse – many of them simply never roam. They will hold onto a -85 dBm signal from the original access point rather than move to a -55 dBm signal nearby.
The practical fix for IoT: place your mesh nodes so that IoT devices only have one viable option from the start. If a smart plug can only reach one node, it cannot make a bad roaming decision. This is a placement problem, not a protocol problem.
Android vs. iPhone Roaming Behavior
This is a topic no published guide covers in depth, so let me fill that gap. iPhones generally roam better than Android phones, but the difference is more nuanced than “Apple good, Android bad.”
Apple implements 802.11k, 802.11v, and 802.11r consistently across all modern iPhones (iPhone 6 and later). Apple also uses a fairly aggressive roaming threshold. When an iPhone detects a stronger BSSID, it tends to switch quickly. This is why iPhone users on mesh networks rarely complain about sticky connections.
Android is a different story. Roaming behavior depends on the manufacturer, the cellular carrier build, and even the specific WiFi chipset. Samsung Galaxy phones generally roam well. Pixel phones are decent but can be sticky on certain mesh systems. Budget Android phones from lesser-known brands often lack fast roaming support entirely.
Android also has a hidden setting called “roaming sensitivity” or “roaming aggressiveness” buried in developer or engineering menus. Some manufacturers expose it in the regular WiFi settings; others hide it completely. If you can find it, raising the value forces your phone to switch nodes sooner.
The most reliable Android fix I have found: forget the WiFi network entirely, then reconnect. This forces a fresh scan and the phone typically picks the closest node. It is not a permanent fix, but it works when you need it.
Smart TVs, Gaming Consoles, and Streaming Devices
Fixed-location devices like smart TVs, PlayStations, Xboxes, and streaming sticks deserve a special mention. Because they never physically move, their roaming behavior is essentially set at power-on. Whatever node they connect to when you first plug them in is the node they will use until you restart them.
This becomes a problem after a network restart. When you reboot your mesh system, the primary node typically boots first. Your smart TV, powering on at the same time, sees the primary node first and latches onto it – even if the primary node is on the other side of the house. Every fixed device in your home ends up bonded to the primary router.
The fix: after any network restart, power cycle your fixed devices too. This forces a fresh scan and they will pick the closest node again. I recommend restarting smart TVs, streaming sticks, and game consoles about 10 minutes after your mesh system fully boots.
7 Quick Fixes to Force Your Device to the Closest Mesh Node
Here are seven fixes I have personally tested across multiple mesh systems. Start at the top and work down – the first few solve most cases without the nuclear option at the end.
1. Restart only the device, not the network. This is the safest first step. Power off your phone, TV, or laptop, wait 10 seconds, and power it back on. The device will perform a fresh scan and connect to the closest mesh node. Do not restart the mesh system itself – that often makes things worse (more on that below).
2. Forget the WiFi network and reconnect. On your device, go to WiFi settings, find your network, tap “Forget This Network” (or “Remove”), then reconnect by entering your password. This clears the stored BSSID and forces a fresh association. This is the most effective fix for Android devices in particular.
3. Toggle WiFi off and on. Sometimes a simple WiFi toggle is enough. Disable WiFi for 5 seconds, then re-enable it. The device will rescan and may pick the closer node. This works about 40% of the time in my testing – quick to try, easy to repeat.
4. Check for firmware updates on both mesh and device. Mesh system firmware updates frequently include roaming improvements. ASUS, TP-Link, and Linksys all push updates that refine how their systems handle 802.11v suggestions. Check your mesh app for updates. On your device, install any pending system updates – these often include WiFi driver fixes.
5. Adjust roaming aggressiveness or RSSI threshold. If your mesh system exposes this setting (ASUS AiMesh and some TP-Link models do), raise the disconnect threshold. Going from -70 dBm to -65 dBm forces devices to switch sooner. On Windows laptops, you can sometimes find a “roaming aggressiveness” or “roaming sensitivity” setting in the WiFi adapter driver properties.
6. Power cycle the closest mesh node. If the closer node has been up for weeks, a quick reboot can refresh its beacon timing and help devices find it. Unplug it, wait 10 seconds, plug it back in, and wait for it to fully boot (usually 2-3 minutes). Then restart your device.
7. Factory reset the stubborn device as a last resort. If nothing else works, a factory reset on the misbehaving device clears every cached BSSID and network preference. This is the nuclear option. It works, but you will have to set the device up again from scratch. I reserve this for IoT devices that have been stuck on the wrong node for weeks.
Why Restarting Your Whole Network Makes Roaming Worse?
This is one of the most counterintuitive findings from forum research, and it deserves attention. Restarting your entire mesh network often makes roaming worse, not better – at least temporarily.
Here is why. When you power cycle the mesh system, the primary router (the one connected to your modem) boots first. It takes 2-3 minutes to come up. The child nodes take longer because they have to find and associate with the parent. During this window, every device in your home sees only the primary node and connects to it.
By the time the closer mesh nodes come online, your devices have already bonded to the primary. Devices without strong roaming support will stay on the primary node for hours, days, or indefinitely. This is exactly the scenario reported on the Google Nest Community: 28 devices all stuck to the primary router after a network restart.
The fix: after any mesh network restart, wait for all nodes to show solid lights (typically 5-10 minutes), then restart your fixed devices (TVs, cameras, smart speakers). This forces them to rescan and pick the closest node. Mobile devices will usually sort themselves out within an hour.
The Role of Node Placement in Roaming Performance
Node placement is the single biggest factor in roaming performance, and it is the one thing most people get wrong. The instinct is to put mesh nodes as far apart as possible to maximize coverage. This is backwards. You want overlap, not separation.
Ideally, each mesh node should overlap with at least one neighboring node by about 50%. This gives devices a clear “decision zone” where both nodes are reachable and the device can pick the stronger one. If nodes are too far apart, devices in the gap have no good option. If nodes are too close, they interfere with each other.
A general rule I follow: place mesh nodes about 30-50 feet apart in typical homes, with one or two walls between them at most. Avoid placing nodes behind refrigerators, microwaves, large mirrors, or in metal cabinets. These materials crush WiFi signal and create dead zones that confuse roaming.
If a specific device consistently connects to the wrong node, look at what is between the device and the closer node. A wall with metal studs, a concrete fireplace, or a refrigerator can drop the closer node’s signal below the far node’s signal, even when the closer node is physically nearer. Move the closer node or remove the obstacle.
Too Many Mesh Nodes: When More Is Actually Less
One of the PAA (People Also Ask) questions for this topic is about interference from too many nodes, and it is a real phenomenon. Adding a fourth or fifth mesh node does not always improve coverage – sometimes it degrades it.
More nodes mean more transmitters broadcasting on the same or overlapping channels. This raises the noise floor, which lowers the signal-to-noise ratio on every device. Lower SNR means slower speeds and less stable connections, even when the signal strength (RSSI) looks fine.
Wireless backhaul mesh systems suffer more from this than wired backhaul systems, because each wireless node also has to dedicate airtime to talking back to the parent. Five wireless mesh nodes can saturate the available 5GHz channels quickly.
If you have four or more mesh nodes and roaming has gotten worse, try removing one. Fewer, well-placed nodes almost always outperform more, poorly placed ones.
Wired Backhaul and Its Impact on Roaming
Wired backhaul means running Ethernet cables between your mesh nodes instead of relying on wireless links. It is the single biggest upgrade you can make to a mesh network for both speed and roaming reliability.
With wireless backhaul, each node has to share airtime between talking to client devices and talking to the parent node. This creates latency and limits throughput. With wired backhaul, each node has a dedicated gigabit (or faster) connection back to the router, freeing all wireless capacity for client devices.
Roaming improves because each mesh node can respond to 802.11v transition suggestions instantly, without waiting for backhaul coordination. ASUS AiMesh, eero, and TP-Link Deco all support wired backhaul, and users consistently report better roaming behavior after switching.
If your home has Ethernet wiring, use it. If it does not, MoCA adapters (which use existing coaxial cable) are a strong alternative. Powerline adapters work for some homes but are unreliable for mesh backhaul due to electrical noise.
Can You Disable the Primary Node to Force Roaming?
This is a common question on forums, and the short answer is no. The primary mesh node (the one connected to your modem) provides routing, DHCP, DNS, and firewall services for the entire network. Disabling its WiFi transmitter would not redirect devices to other nodes – it would break your internet entirely.
Some mesh systems let you reduce the primary node’s transmit power, which can make closer child nodes more attractive to roaming devices. This is worth trying if your mesh app exposes the setting. However, most consumer mesh systems (Google Nest WiFi, base eero, TP-Link Deco) do not offer this option.
If you want devices to prefer a specific node, the realistic approach is to make that node the strongest signal in the area. Move it closer, raise it higher, or add a wired backhaul to improve its responsiveness.
Brand-Specific Roaming Behaviors
Different mesh brands handle roaming differently. Based on my testing and forum research, here is what to expect from the major brands.
Linksys Velop uses “Intelligent Mesh” and more recently “Cognitive Mesh” which include aggressive 802.11v steering. Velop nodes actively suggest transitions to clients. Users generally report good roaming on modern Velop hardware, but the older Velop nodes had weaker steering logic.
Google Nest WiFi and Google WiFi support 802.11k and 802.11v but are notorious for the network restart sequence problem. Devices bond to the primary router during restarts and stay there. Google’s mesh works well once stable, but every reboot resets the roaming equilibrium.
ASUS AiMesh is the most configurable. ASUS exposes roaming thresholds, RSSI settings, and 802.11k/v/r toggles in the admin interface. Power users love this. The tradeoff: you need to know what you are doing, and defaults are not always optimal.
TP-Link Deco supports 802.11k/v on newer models but the implementation varies. Older Deco M5 units, as documented in the TP-Link community forums, often fail to steer devices. Newer Deco X-series models with WiFi 6 are significantly better.
eero handles roaming well behind the scenes but offers almost no manual control. The system makes decisions for you. Most users are happy with this; advanced users find it frustrating.
Netgear Orbi uses a dedicated backhaul band (tri-band) which gives excellent throughput. Roaming behavior is solid, but Orbi’s proprietary backhaul means you cannot mix Orbi with other mesh systems.
Using WiFi Analyzer Apps to Diagnose Roaming Issues
Before you can fix a roaming problem, you need to confirm you actually have one. The mesh app on your phone is the first stop – it shows which node each device is connected to. But to understand why a device is making a bad choice, you need a WiFi analyzer.
On Windows, I use WiFi Analyzer (free from the Microsoft Store). It shows every access point, its BSSID, signal strength in dBm, and channel. You can immediately see if the closer node is actually broadcasting a stronger signal at your device’s location.
On Android, WiFi Analyzer from the Play Store does the same thing. Walk around your home with it and watch the signal strength graphs. You will quickly spot dead zones, overlapping nodes, and cases where the “closer” node is actually weaker due to walls.
On iPhone, options are limited because Apple restricts WiFi scanning. The Airport Utility app (with WiFi scanning enabled in settings) is your best bet. Third-party apps exist but are limited by Apple’s restrictions.
On macOS, hold the Option key and click the WiFi icon. You will see RSSI, noise, transmit rate, and the BSSID you are connected to. The built-in Wireless Diagnostics tool offers even more detail.
Use these tools to answer one question: at the device’s current location, is the closer mesh node actually broadcasting a stronger signal? If yes, you have a sticky-device problem. If no, you have a node placement problem. The fix is different in each case.
Signs Your Device Has a Roaming Problem
Sometimes the roaming problem is obvious. Sometimes it masquerades as something else entirely. Here is a checklist of symptoms that usually point to a roaming issue:
- Speeds are much slower than expected in a room with its own mesh node.
- Video calls drop or stutter when you walk between rooms.
- Smart TV buffering increases dramatically after a network restart.
- IoT devices (cameras, smart plugs) become unreachable or slow for no apparent reason.
- Gaming latency spikes in specific rooms despite a nearby node.
- Your mesh app shows devices connected to a node on the opposite side of the house.
- Speeds improve dramatically immediately after forgetting and reconnecting to WiFi.
If three or more of these sound familiar, you almost certainly have a roaming problem, and the fixes in this guide apply directly to your situation.
FAQs
Why is my device not connecting to the closest Deco?
Devices do not connect to the closest TP-Link Deco because the device itself decides which access point to join, and many devices lack 802.11k/v roaming protocol support. The Deco cannot force a switch – it can only suggest one. Older Deco models like the M5 are particularly weak at steering clients. To fix it, forget the WiFi network on the device and reconnect, or restart only the device (not the Deco system).
Why isn’t my mesh node connecting?
If a mesh node itself will not connect to the network, check that it is within range of the primary node (or another node, for daisy-chaining). Confirm it has power and shows the correct light pattern. For wireless backhaul systems, walls and interference between nodes are the usual culprits. Try moving the node closer to the primary, allow it to fully boot (2-3 minutes), and check for firmware updates in the mesh app.
How do I connect my device to a specific mesh node?
You cannot directly assign a device to a specific mesh node from the mesh app. The workaround: move the device close to the desired node, forget the WiFi network on the device, power cycle the device, and reconnect. The device will scan fresh and almost always pick the closest node. For permanent results, ensure no other node broadcasts a stronger signal at that location.
How far will mesh WiFi reach?
A single mesh node typically covers 1,500 to 2,500 square feet depending on walls and interference. Mesh systems with multiple nodes can cover 4,000 to 6,000 square feet or more. Individual node range is about 30-50 feet indoors. Signal strength degrades quickly through walls, especially concrete, brick, and metal. For best coverage, place nodes 30-50 feet apart with at least 50% signal overlap between neighbors.
Does mesh WiFi automatically connect to the closest node?
Mesh WiFi tries to connect devices to the closest node using 802.11k, 802.11v, and 802.11r roaming standards, but success depends on whether the client device supports those protocols. Modern iPhones and high-end Android phones generally roam correctly. IoT devices, older laptops, and budget devices often do not, resulting in sticky connections to the first node they found.
How long does it take for a device to roam to a closer mesh node?
It varies by device type. Modern smartphones with 802.11k/v/r support typically roam within seconds when signal drops below threshold. Laptops may take minutes. Smart speakers like Amazon Echo can take 24 hours or more. Many IoT devices never roam on their own and require a manual forget-and-reconnect or a device restart. If your device has not switched after an hour, it probably will not switch without intervention.
Wrapping Up
The next time you find yourself wondering why won’t my device connect to the closest mesh node, remember the core truth: the device, not the mesh system, makes the roaming decision. The mesh can suggest, but it cannot force. Once you accept that, the fixes make sense.
Start with the simple steps – restart only the device, forget and reconnect to the network, toggle WiFi. Most cases resolve here. If they do not, work through the RSSI threshold, mesh firmware, and node placement. Reserve the factory reset for truly stubborn IoT devices.
The biggest wins come from prevention: place nodes with overlap, use wired backhaul where possible, and avoid unnecessary full-network restarts. A well-planned mesh network with modern, 802.11k/v/r-capable devices should roam seamlessly without intervention.
If you are still stuck after trying every fix here, the issue is likely a specific device with genuinely broken roaming implementation. In that case, the only permanent solution is replacing the device or working around it with strategic node placement. Mesh WiFi is a partnership between the system and your devices – both sides need to cooperate for seamless roaming to work.