
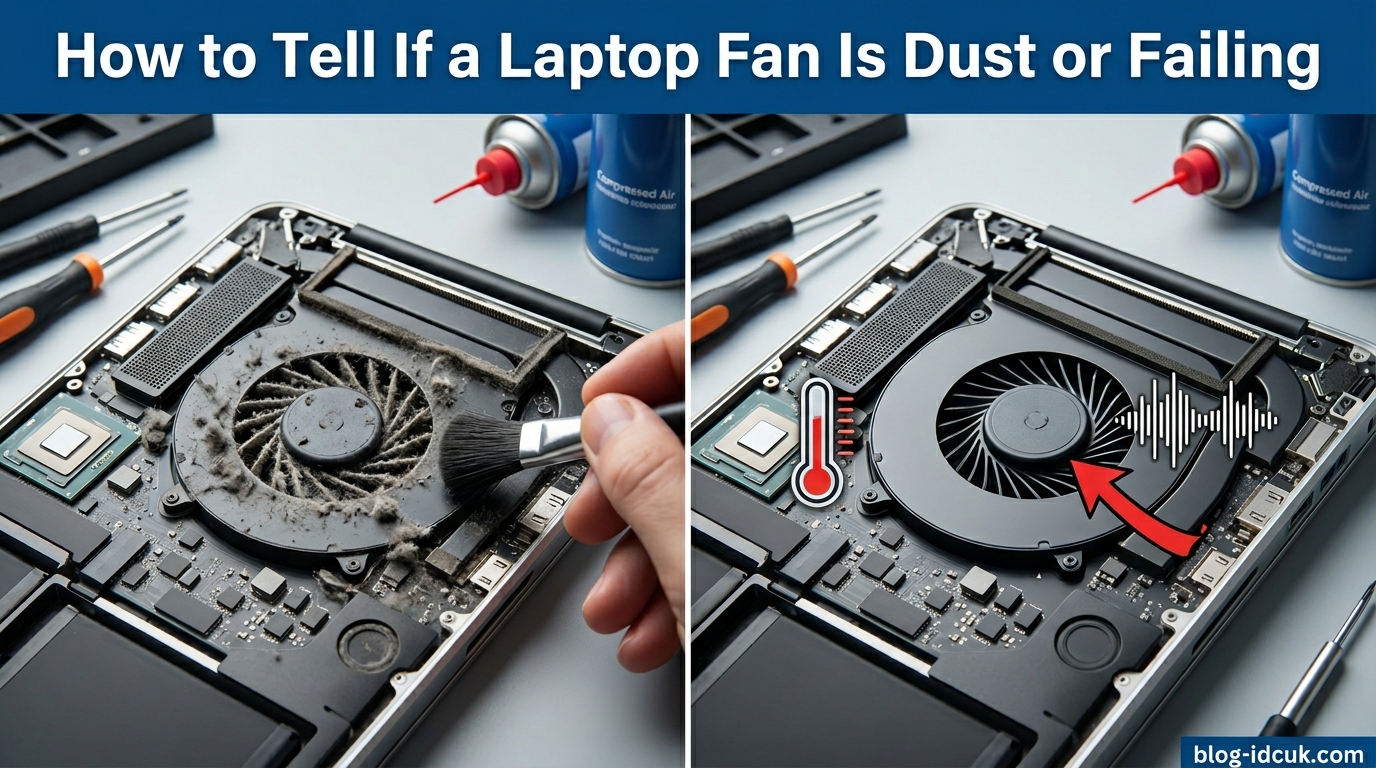
There is nothing more frustrating than a laptop that suddenly sounds like a tiny jet engine on your desk. You close every app, the noise keeps going, and you start wondering whether a quick cleaning will fix it or whether you are staring at a hardware failure. Knowing how to tell if a loud laptop fan is dust or a failing fan is the difference between a 10-minute fix and a part replacement that could otherwise catch you off guard.
After helping friends, family, and coworkers troubleshoot dozens of noisy laptops over the years, I can tell you that almost every loud fan falls into one of two camps. Either dust has built up inside the vents and on the fan blades, forcing the fan to spin harder to push air through clogged cooling fins, or the fan motor and bearings are wearing out and producing mechanical noise that no amount of cleaning will silence.
This guide walks you through a clear diagnostic process so you can figure out which problem you actually have. I will cover the noise types that point to dust, the sounds that point to a dying fan, the free software tools that confirm the diagnosis, and the exact cleaning steps that work in most cases. By the end, you will know whether to grab a can of compressed air or start shopping for a replacement fan.
Table of Contents
Dust vs Failing Fan: Quick Comparison Table
The fastest way to start your diagnosis is to compare your laptop’s symptoms side by side. The table below summarizes the key differences between dust buildup and a failing fan so you can quickly narrow down the cause before running any tests.
| Symptom or Sign | Dust Buildup | Failing Fan |
|---|---|---|
| Type of noise | Louder whooshing or whirring, fan running at high speed | Grinding, buzzing, clicking, rattling, or scraping sounds |
| When it started | Gradually over weeks or months | Suddenly, or after a drop or bump |
| Constant or intermittent | Constant when CPU is under load | Often intermittent, worsens over time |
| Fan speed behavior | Runs at high RPM to compensate for poor airflow | May struggle to reach normal RPM, or stutter |
| CPU temperature | Elevated (80-95C under load) | Can be high or normal depending on bearing damage |
| Visible dust at vents | Usually present | May or may not be present |
| Fix | Clean vents and fan (compressed air or disassembly) | Replace the fan |
| Approximate cost | Free to $10 (compressed air) | $15-$50 part, plus labor if not DIY |
| Urgency | Medium – clean soon to prevent overheating | High – failing fan can lead to permanent damage |
If your laptop matches the left column on most rows, dust is almost certainly your culprit. If it matches the right column, especially for noise type and onset, you are likely dealing with a fan that needs replacement.
Listen to the Noise: What Each Sound Means
Your ears are the single best diagnostic tool you have. The type of sound your laptop fan makes tells you a lot about what is happening inside, and learning to decode these sounds is one of the most reliable ways to tell dust apart from bearing failure. Forum users on Reddit and Tom’s Hardware repeatedly confirm that matching noise type to cause is the most accurate first step.
Whooshing, Whirring, or Air Rushing Sounds
A loud but smooth whooshing or whirring sound usually means the fan is simply spinning fast to push air. This is the classic signature of dust buildup. The vents are partially blocked, so the fan compensates by spinning at a higher RPM, and you hear the increased airflow. The sound stays consistent and never develops a metallic or mechanical edge. This is the easiest problem to fix with cleaning.
Grinding or Scraping Sounds
Grinding or scraping noises are a strong indicator of worn fan bearings. Inside the fan motor, small bearings allow the blades to spin smoothly, and when those bearings wear down or lose lubrication, metal rubs against metal. If you hear grinding, stop running the fan at high speeds for long periods, because continued use can damage the motor permanently. Replacement is usually the only reliable fix.
Buzzing or Vibrating Sounds
A buzzing noise can go either way, but it often points to a loose fan blade, debris caught between the blades and the housing, or a fan that has come slightly loose from its mounting screws. Sometimes a single compressed air blast dislodges the debris and the buzzing stops. If it returns immediately or persists, the fan housing or bearings may be damaged.
Rattling or Clicking Sounds
Rattling and clicking typically mean something inside the fan assembly is loose. This could be a broken fan blade, a loose mounting screw, or a bearing that has degraded enough to allow the rotor to wobble. These sounds almost always indicate hardware failure rather than dust, and they tend to worsen quickly once they start.
High-Pitched Whining
A high-pitched whine can come from coil whine in the CPU or GPU power circuitry rather than the fan itself, so do not jump straight to fan replacement if you hear this sound. To isolate the source, briefly stop the fan with a soft object (only for a second or two, and only if you are comfortable doing so). If the whine continues, it is coil whine. If it stops, the fan motor itself is the source.
How to Diagnose Dust Buildup?
If the comparison table and noise guide point toward dust, the next step is to confirm the diagnosis with a few objective tests. Dust buildup has predictable effects on temperature, fan speed, and airflow, so you can verify it without opening the laptop.
Step 1: Inspect the Vents Visually
Shine a flashlight into the exhaust vents on the side or back of your laptop and look for visible dust, lint, or hair. A clean vent shows clear metal cooling fins behind the grille. A dust-clogged vent looks fuzzy, grey, or matted. If you see a visible mat of dust, you have already found your problem.
Step 2: Feel the Airflow
Put your hand near the exhaust vent while the laptop is running under a normal workload like a web browser with several tabs. You should feel a steady stream of warm air. Weak or barely noticeable airflow, even when the fan is clearly running fast, is a strong sign that the airflow path is blocked by dust somewhere between the intake and the exhaust.
Step 3: Check CPU Temperature
Install a free temperature monitor (more on tools below) and check your CPU temperature at idle and under load. A healthy idle temperature is typically 40-55C, while a dusty laptop often sits at 60-75C at idle with nothing running. Under load, dusty laptops regularly spike to 90C or higher, while clean laptops of the same model stay under 85C.
Step 4: Monitor Fan RPM
Use HWMonitor or your laptop manufacturer’s diagnostic tool to read the fan RPM. Compare it to what the fan does at idle versus load. If the fan is constantly running at 4000 RPM or higher with no apps open, the laptop is fighting heat that should not be there at idle. That heat almost always comes from blocked airflow.
Step 5: Test the Quick Cleaning Method
Before committing to a full disassembly, give the vents a short burst of compressed air from the outside. If the fan noise drops noticeably and the temperature falls by 5-10C within minutes, dust was the cause all along. If nothing changes after two or three bursts, the dust is likely packed deep inside where external air cannot reach, or the problem is the fan itself.
How to Tell If Your Fan Is Failing?
Diagnosing a failing fan requires a slightly different approach, because the symptoms are mechanical rather than thermal. The fan may still spin and still move air, but it makes noises it should not make or behaves erratically in ways that point to motor or bearing damage.
Sign 1: Mechanical Noise That Cleaning Does Not Fix
If you have already cleaned the fan and the noise persists or returns within hours, you are most likely hearing bearing wear rather than dust. A clean, healthy fan is essentially silent except for the sound of moving air. Any grinding, rattling, or metallic sound after cleaning points to a fan that needs replacement.
Sign 2: Fan Speed Stutters or Drops
Watch the fan RPM in HWMonitor over a few minutes under steady load. A healthy fan holds a stable RPM or ramps smoothly as temperature rises. A failing fan may stutter, drop suddenly, or refuse to spin up to its normal maximum speed. This happens when worn bearings create friction that the motor cannot overcome.
Sign 3: The Fan Wobbles or Vibrates
If you are comfortable opening the laptop, gently spin the fan blade with a finger. A healthy fan spins freely and silently. A failing fan feels gritty, resists rotation, or wobbles on its axis. Visible wobble or a grinding feel when you spin it by hand is a definitive sign of bearing failure.
Sign 4: Temperature Spikes Followed by Shutdowns
If your laptop suddenly shuts down during normal use, especially with no warning, the fan may have stopped spinning entirely. Most modern laptops have thermal protection that powers off the system before the CPU is damaged. If this happens, stop using the laptop immediately and inspect the fan, because running it without cooling can permanently damage the processor.
Sign 5: Noise Started After a Drop or Impact
Physical impact is a common trigger for fan failure. If your laptop recently fell, was knocked off a desk, or took a hard bump in a backpack, and the fan noise started right after, you are probably dealing with a damaged fan blade, broken bearing, or dislodged mounting. Cleaning will not fix impact damage.
Software Tools to Monitor Fan Speed and Temperature
You do not need to open your laptop to gather a lot of useful diagnostic data. Free monitoring tools give you real-time readings of fan RPM, CPU temperature, and GPU temperature, which makes them invaluable for confirming whether you are dealing with dust or a failing fan.
HWMonitor (Windows, Free)
HWMonitor from CPUID is the most popular free option and the one Reddit users recommend most often. It shows voltages, temperatures, and fan speeds in a single window. Pay attention to the fan RPM reading under your motherboard section, and watch the CPU temperature while you put the laptop under load with a browser, video, or benchmark.
Core Temp (Windows, Free)
Core Temp focuses specifically on CPU temperature and shows per-core readings in real time. It is lighter than HWMonitor and sits quietly in the system tray. Use it when you want a quick read on whether your CPU is running hotter than it should at idle.
BIOS or UEFI (All Laptops)
Reboot your laptop and enter the BIOS or UEFI setup screen (usually by pressing F2, F10, F12, or Del during boot). Many BIOS screens show live fan RPM and CPU temperature without any operating system load. This is a clean baseline, because nothing else is running. If your fan RPM is unusually high in BIOS at idle, dust or a thermal sensor problem is likely.
Manufacturer Diagnostic Tools
Dell laptops ship with SupportAssist, which includes a hardware checkup that tests the fan. HP and Lenovo offer similar built-in diagnostics accessible through their support apps or by pressing a function key at boot. These tools can sometimes detect a failing fan directly, saving you the guesswork.
How to Clean Your Laptop Fan (Step-by-Step)?
If your diagnosis points to dust, cleaning is the fix. The goal is to remove dust from the vents, the fan blades, and the cooling fins without damaging anything. You have two cleaning paths: external cleaning with compressed air (no disassembly required) and internal cleaning (full or partial disassembly).
External Cleaning with Compressed Air
Step 1: Shut down the laptop completely and unplug it from the charger.
Step 2: Take the laptop to a well-ventilated area, because the dust you dislodge will fly out.
Step 3: Hold the can of compressed air upright and insert the straw into the nozzle.
Step 4: Locate the intake vents (usually on the bottom) and the exhaust vents (usually on the side or back).
Step 5: Give each vent a series of short, two-second bursts of air. Do not spray continuously, because the can gets cold and loses pressure.
Step 6: If possible, briefly prevent the fan from spinning with a toothpick while you blast air through the exhaust vent, because forcing the fan to spin at high speed with compressed air can damage the bearings.
Step 7: Let the laptop sit for a few minutes to let any moisture from the air can evaporate.
Step 8: Power on and check temperatures and fan RPM to see if there is an improvement.
External cleaning is fast and free of risk, but it only removes surface dust. Forum users consistently report that compressed air alone is a temporary fix, because deep dust bunnies remain stuck to the fan blades and cooling fins. Expect to repeat this every few weeks unless you go deeper.
Internal Cleaning (Partial or Full Disassembly)
Step 1: Check your warranty status. Opening some laptops voids the warranty, while others allow user service. Look up your specific model before proceeding.
Step 2: Shut down the laptop, unplug it, and remove the battery if possible.
Step 3: Ground yourself by touching a metal object to discharge static electricity, or wear an anti-static wrist strap.
Step 4: Remove the bottom panel using the correct screwdriver. Keep screws organized so you know where each one goes back.
Step 5: Locate the fan and use compressed air or a soft brush to remove dust from the blades and the surrounding heatsink fins.
Step 6: If dust is stuck to the blades, gently wipe with a cotton swab lightly dampened with rubbing alcohol.
Step 7: Reassemble the laptop carefully, making sure every screw goes back in its original hole.
Step 8: Power on and verify that temperatures have dropped and noise has decreased.
Internal cleaning is the only method that fully removes packed dust. Most users who report long-term success on Tom’s Hardware and Reddit have done at least one internal cleaning rather than relying on compressed air alone.
When to Replace the Fan vs Clean It?
Deciding between cleaning and replacement comes down to whether the fan itself is mechanically sound. Cleaning fixes thermal problems caused by dust. Replacement fixes mechanical problems caused by worn bearings or damaged blades.
Clean the fan if the noise is a smooth whooshing sound, the fan reaches normal RPM, the noise started gradually, and external cleaning produces a noticeable improvement. Replacement is not necessary in these cases, and a thorough cleaning can buy you months or years of quiet operation.
Replace the fan if you hear grinding, scraping, or persistent rattling, if the fan stutters or refuses to reach normal RPM, if cleaning has no effect, or if the noise appeared after a physical impact. Replacement fans for common laptops are often available for $15-$50 on eBay or from the manufacturer, and as one Reddit user noted, you have already done half the work once you open the laptop.
If your laptop is still under warranty, contact the manufacturer before replacing the fan yourself. Most warranties cover fan replacement, and you avoid any risk of voiding coverage. If the laptop is out of warranty and you are comfortable with a screwdriver, replacing the fan is a manageable DIY job on most models.
How to Prevent Laptop Fan Noise
Prevention is easier than any fix. A few small habits dramatically reduce how often you need to deal with fan noise in the first place.
Always use your laptop on a hard, flat surface. Soft surfaces like beds, couches, and laps block the intake vents on the bottom of the laptop, which forces the fan to work harder and pulls dust and lint directly into the cooling system.
Clean the vents with compressed air every two to three months, even if the laptop seems quiet. Preventive cleaning removes dust before it has a chance to pack down and become difficult to dislodge.
Consider a laptop stand or cooling pad. Even a simple raised stand improves airflow under the laptop, and active cooling pads with their own fans can reduce internal temperatures by several degrees.
Keep your operating system and drivers updated. BIOS updates sometimes adjust fan curves to run the fan more efficiently, and outdated drivers can cause unnecessary CPU load that heats up the system.
Manage background processes. Open Task Manager on Windows or Activity Monitor on Mac and look for apps consuming CPU when you are not actively using them. Background updates, crypto miners, and runaway browser tabs all generate heat that keeps the fan spinning.
Safety Warnings Before You Open Your Laptop
A few cautions are worth stating clearly before you grab a screwdriver. These apply whether you are cleaning or replacing the fan.
Check your warranty first. Opening some laptops voids the warranty entirely. If your laptop is still covered, contact the manufacturer for service instead of opening the case yourself.
Discharge static electricity. Static shocks can kill laptop components instantly. Touch a grounded metal object before touching internal parts, and work on a hard surface rather than carpet.
Use compressed air responsibly. Never shake the can, never spray while upside down (the liquid propellant can damage electronics), and never let the fan spin freely at high speed from the air pressure, because that can damage the bearings you are trying to preserve.
Keep track of every screw. Laptop screws come in multiple lengths, and forcing a long screw into a hole meant for a short one can puncture the motherboard or the battery. Use a magnetic mat or a labeled diagram to keep them organized.
Why Is My Laptop Fan Loud When Nothing Is Running?
This is one of the most common questions in laptop support forums, and it deserves its own answer because the cause can be either dust or a software problem masquerading as dust.
If your fan runs constantly at high speed with no apps open, start by opening Task Manager (Ctrl+Shift+Esc on Windows) and sorting by CPU usage. Look for any process using more than a few percent of CPU. Common culprits include Windows Update running in the background, antivirus scans, syncing apps like OneDrive or Google Drive, and outdated or buggy drivers. Ending or updating these processes often silences the fan immediately.
If Task Manager shows nothing consuming CPU and the fan is still loud, the cause is almost certainly thermal. Either dust is making the laptop run hotter than it should at idle, or the thermal paste between the CPU and the heatsink has dried out. Both issues require opening the laptop to fix properly.
A fan that runs loud even in BIOS at idle is a particularly telling sign, because the operating system is not loaded and no apps are running. In that case, dust or dried thermal paste is the most likely cause, and cleaning plus a thermal paste replacement usually solves the problem.
FAQs
How to tell if laptop fans are dusty?
Signs of a dusty laptop fan include louder-than-normal whooshing or whirring sounds, the fan running constantly at high RPM, elevated CPU temperatures (60C or higher at idle), weak airflow from the exhaust vents, and visible dust or lint in the vent grilles. Shine a flashlight into the vents to look for a mat of dust, and check CPU temperature with HWMonitor or Core Temp. A clean laptop idles around 40-55C; a dusty one often idles 60-75C.
What are signs of laptop fan failure?
Signs of a failing laptop fan include grinding, scraping, rattling, or persistent clicking noises, fan RPM that stutters or will not reach normal speed, a fan that wobbles or feels gritty when spun by hand, sudden laptop shutdowns under load, and noise that persists or returns immediately after cleaning. If you notice any of these, especially after a drop or impact, the fan likely needs replacement rather than cleaning.
Can dust cause a laptop fan to be loud?
Yes, dust is the single most common cause of loud laptop fan noise. Dust blocks the intake and exhaust vents and coats the fan blades and cooling fins, which restricts airflow and forces the fan to spin faster and louder to keep the CPU cool. Cleaning the vents with compressed air or opening the laptop for a deeper clean usually reduces both the noise and the temperature significantly.
Should I be concerned if my laptop fan is loud?
A loud fan is worth investigating but not always cause for alarm. If the sound is smooth whooshing under load, dust buildup is the likely cause and cleaning will fix it. If you hear grinding, rattling, or scraping, or if the laptop shuts down on its own, the fan may be failing and you should address it promptly to avoid overheating damage to the CPU or GPU. Either way, ignoring persistent loud fan noise risks long-term thermal damage.
Conclusion
Figuring out how to tell if a loud laptop fan is dust or a failing fan comes down to two simple questions: what does the noise sound like, and does cleaning change anything. Smooth whooshing that responds to compressed air points to dust. Grinding, rattling, or stuttering RPM points to a fan that needs replacement. Use the comparison table, listen closely, confirm with free monitoring software, and you will know which fix to apply before you spend a dollar or take a screwdriver to your laptop.